22+ Garden Edging Ideas for Flower Beds
If you're tired of grass growing into your flower beds, or mulch washing onto your patio, then you've come to the right place. These garden edging ideas are made from many different materials, available in many price ranges and require different skill levels to install. Truly something for everyone.
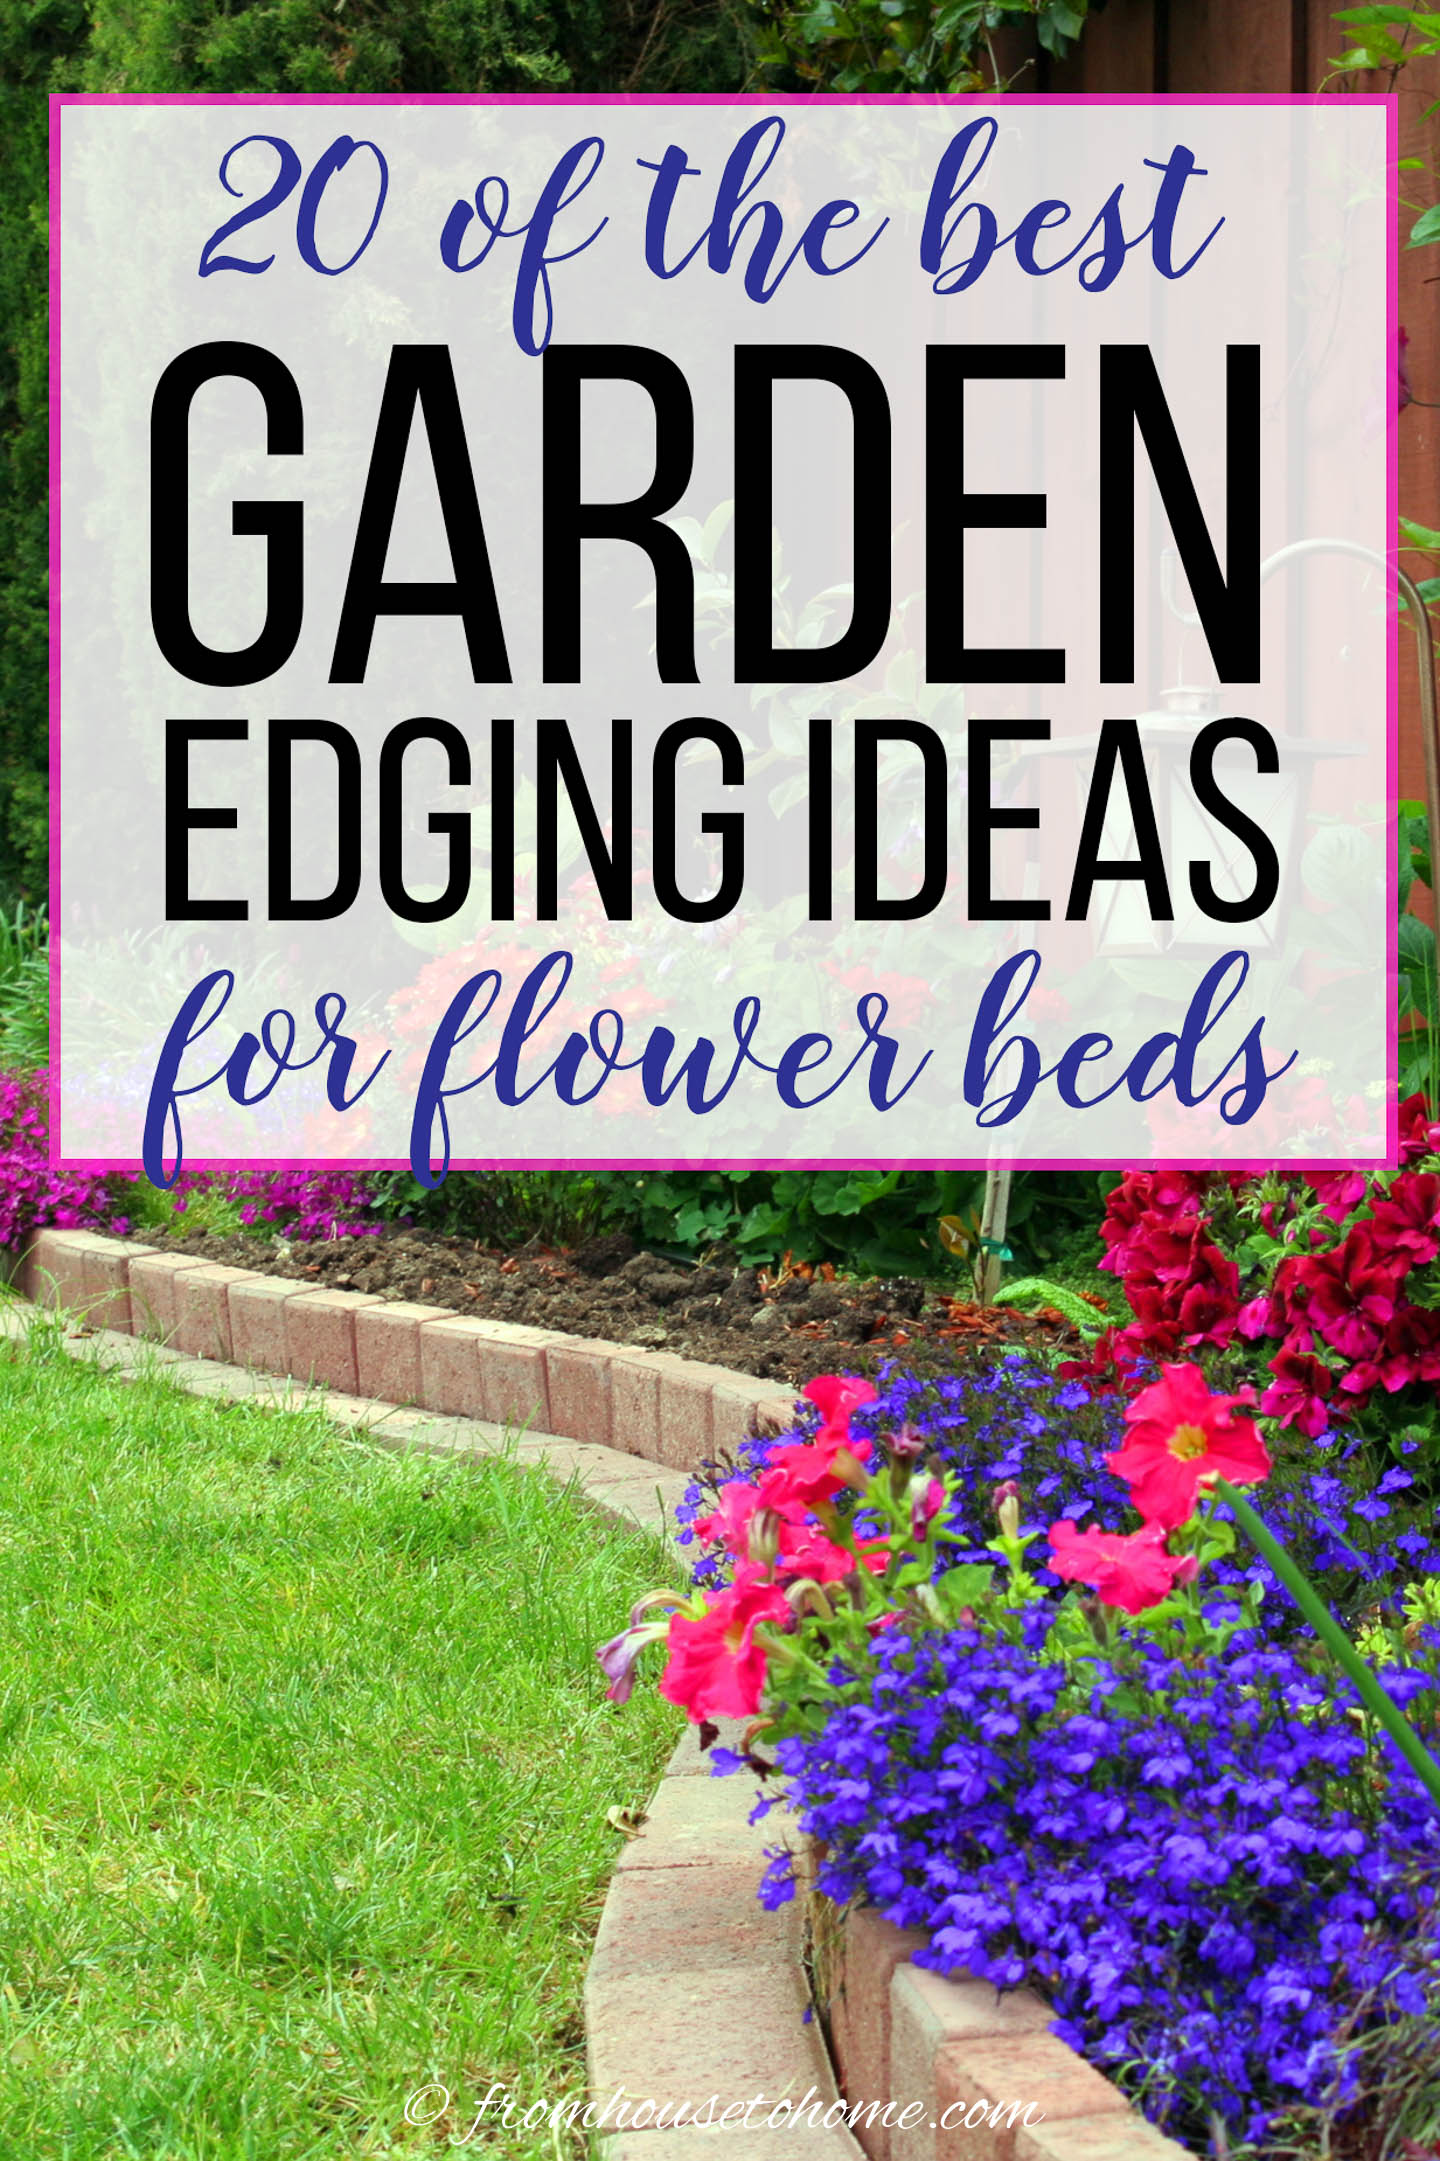
Do you think your flower beds need edging? If so, this post will give you some great ideas!
You'll be surprised at the different styles of edging available, and how easy some of them are to install. Most are a DIY project that any gardener can do.
Whether you're looking for a quick and simple solution that doesn't cost much money, or something more decorative that will make your yard really stand out, there are plenty of options to choose from.
Why do you need garden edging?
But before we start, it helps to know exactly why you need garden edging so that you pick the right style.
Besides looking pretty and separating garden beds from lawns, pathways and patios, garden edging can serve a few other important functions:
- It can act as a mowing edge between your lawn and your garden. Installing a flat edging surface around your garden beds will make it easier to mow the grass without accidentally cutting down plants or requiring extra clean-up work with an edger.
- Using an edging that is buried at least part way underground will help to keep the grass from growing into your garden beds.
- If you have mulched or amended the soil in your garden beds, putting up taller edging prevents the mulch and soil from being washed off onto your lawn and walkways when it rains.
- Taller edging can also provide a barrier that prevents people and pets from accidentally walking on your flowers or vegetables.
Knowing what function(s) you want it to do will help you decide which of these garden edging ideas will work best in your yard.
1 | Brick garden edging ideas
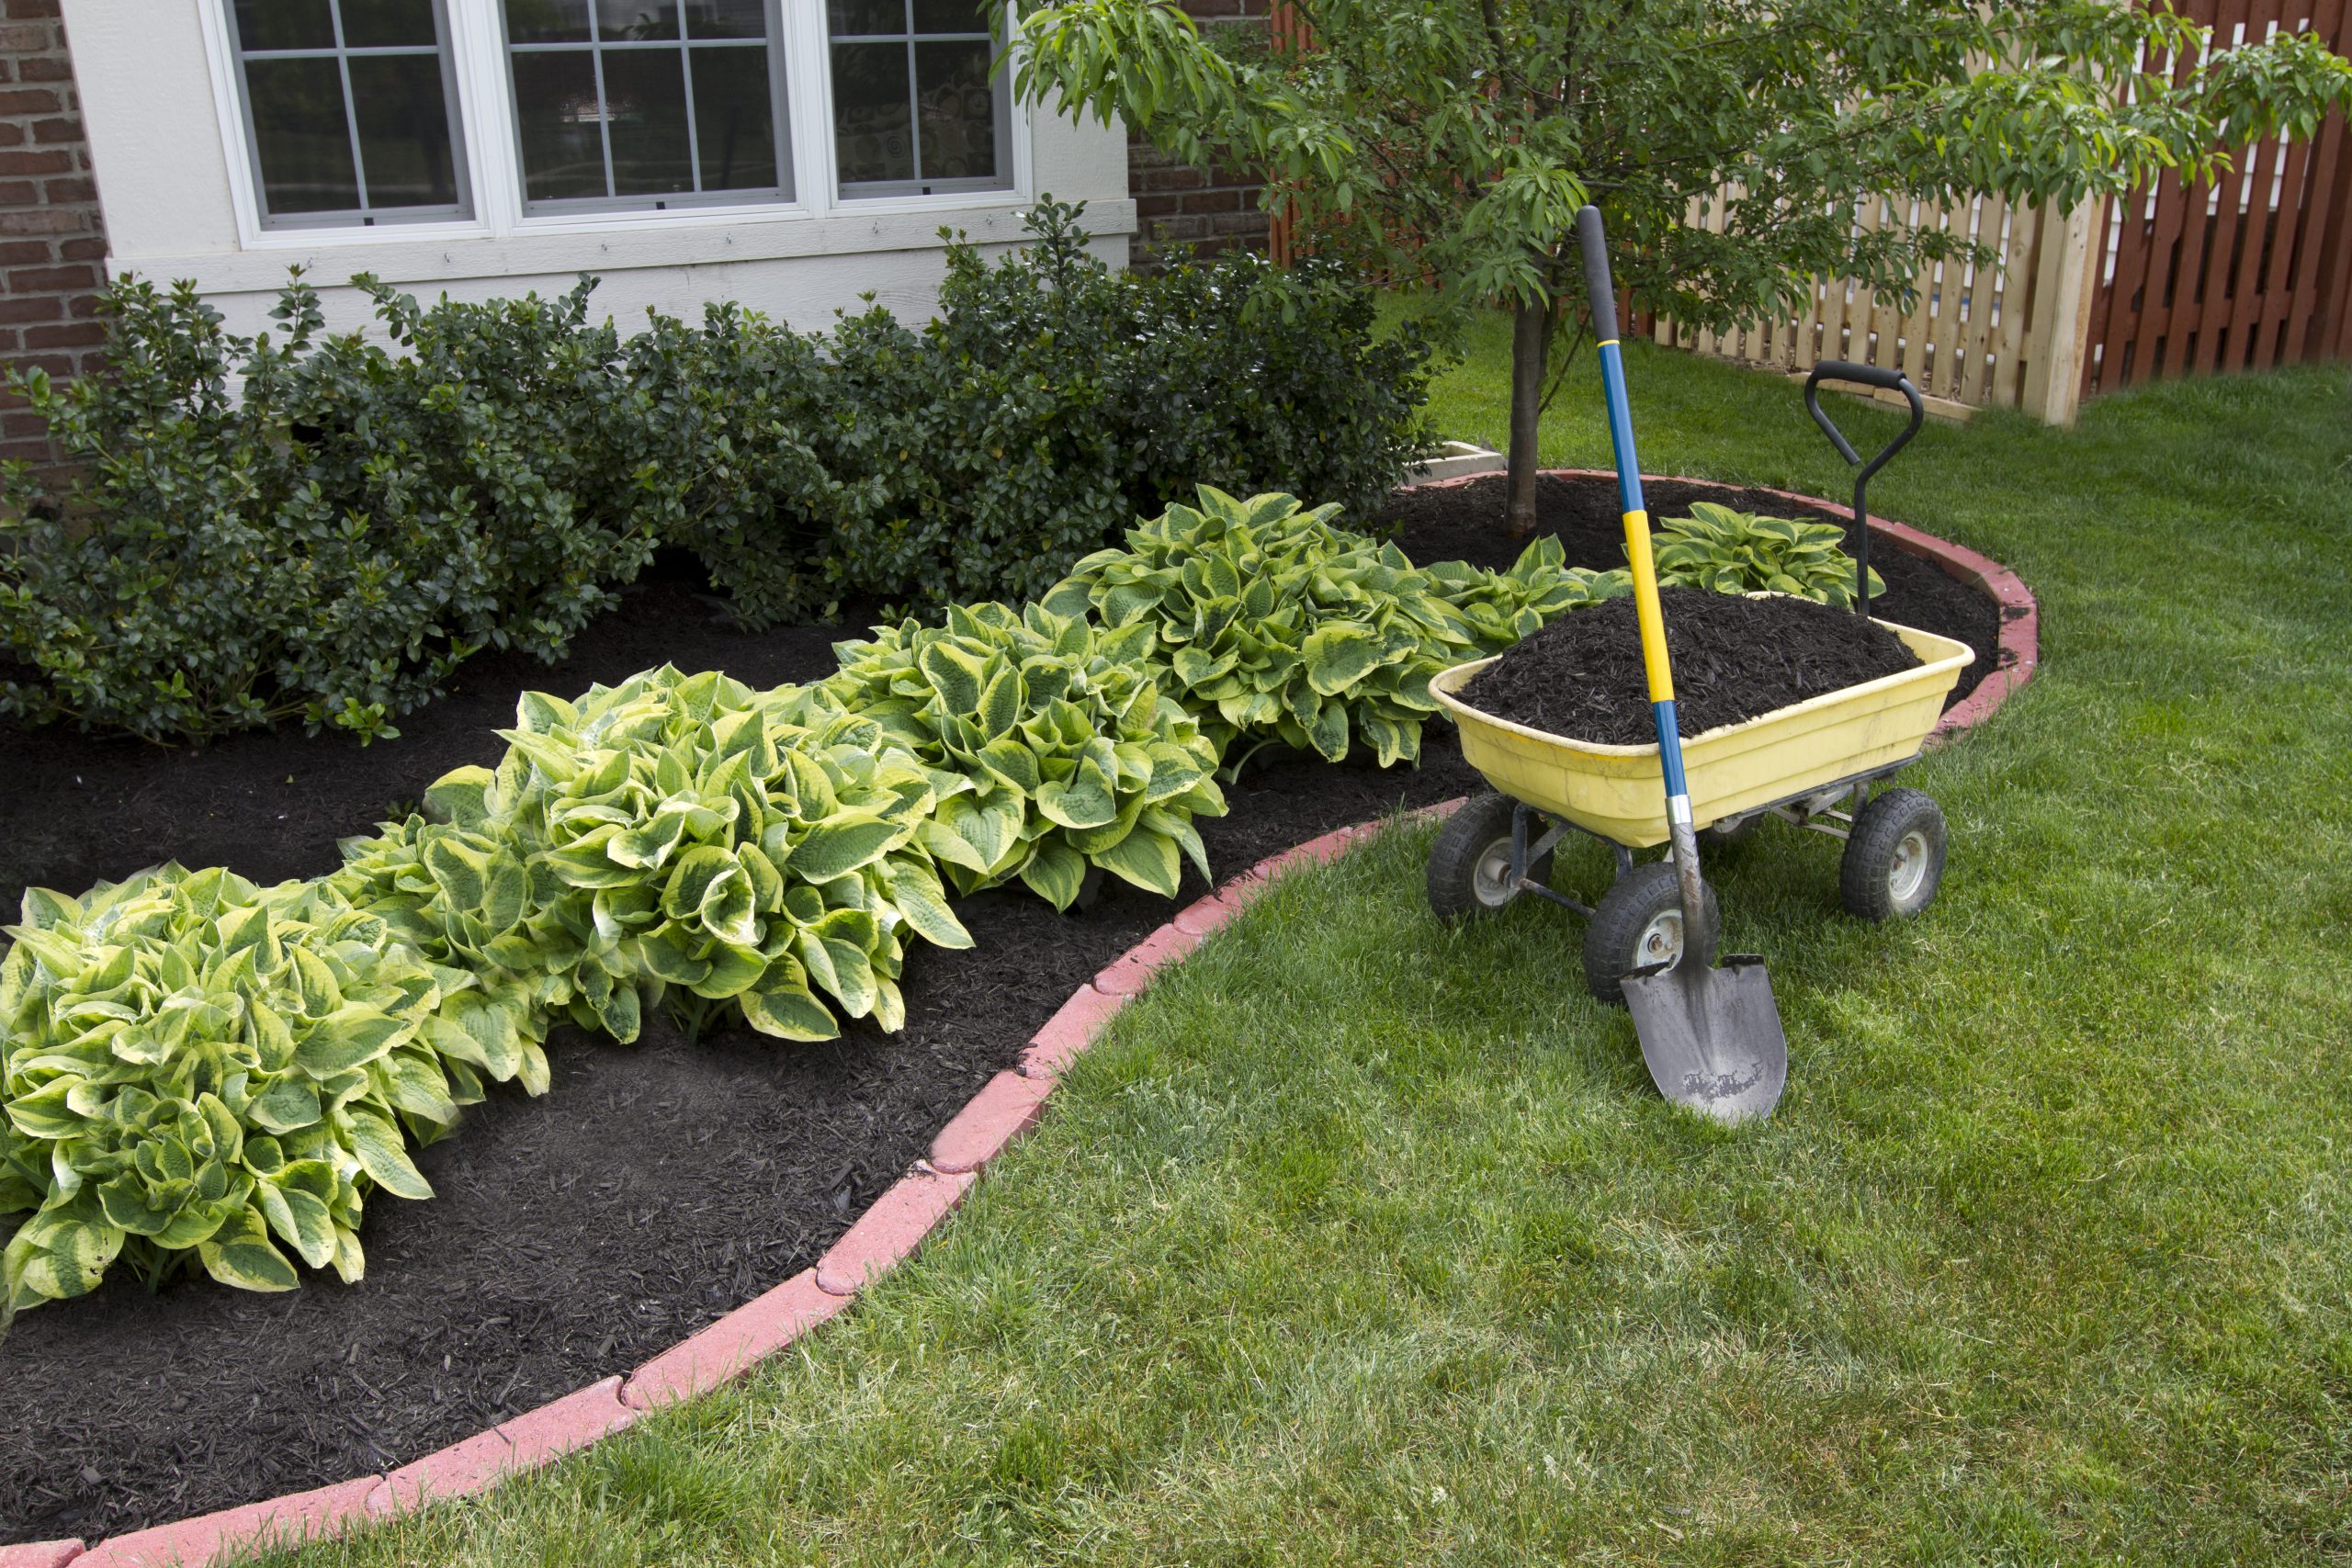
If you want something classic and stable, choosing a brick edging is the way to go.
Depending on how you lay it and the style of brick you use, you can get quite a few different looks and functions from it.
Sunken brick
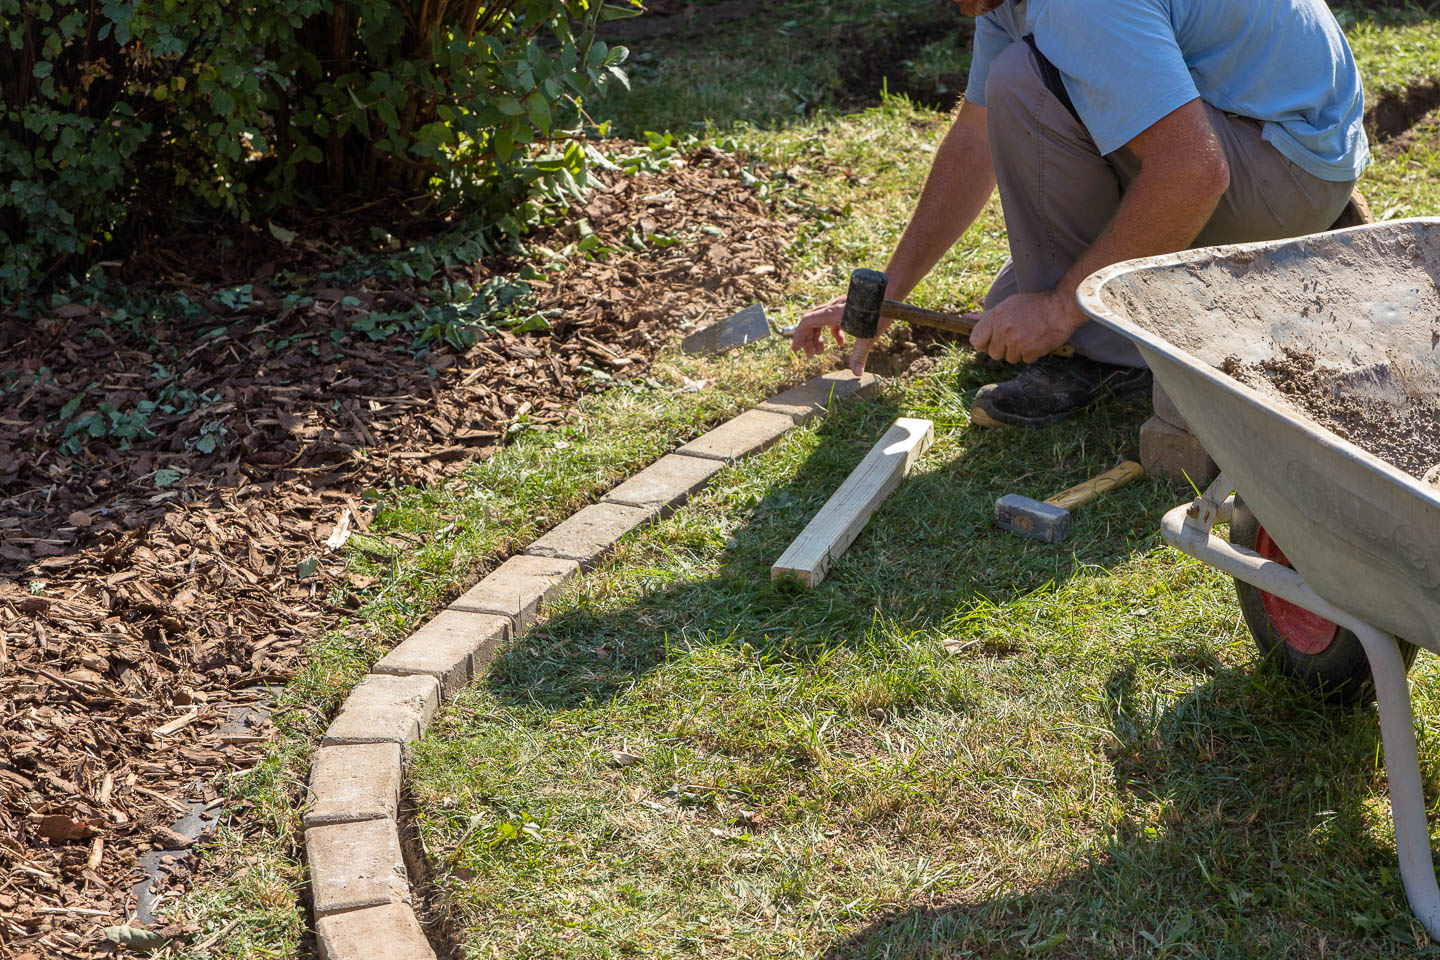
Sunken bricks are a very common way of creating a mowing edge to separate the lawn from your garden.
They are installed by digging a trench into the grass and using a mallet to compact the bricks into place.
This creates a streamlined look where the grass, brick, and garden bed are all at the same level.
The brick creates a clear distinction between lawn and garden, also making it easier for a lawnmower to cut grass without damaging any plants in the bed.
One thing to keep in mind: Because of its rectangular shape, bricks can be a little awkward to work with if they have to go around tight curves.
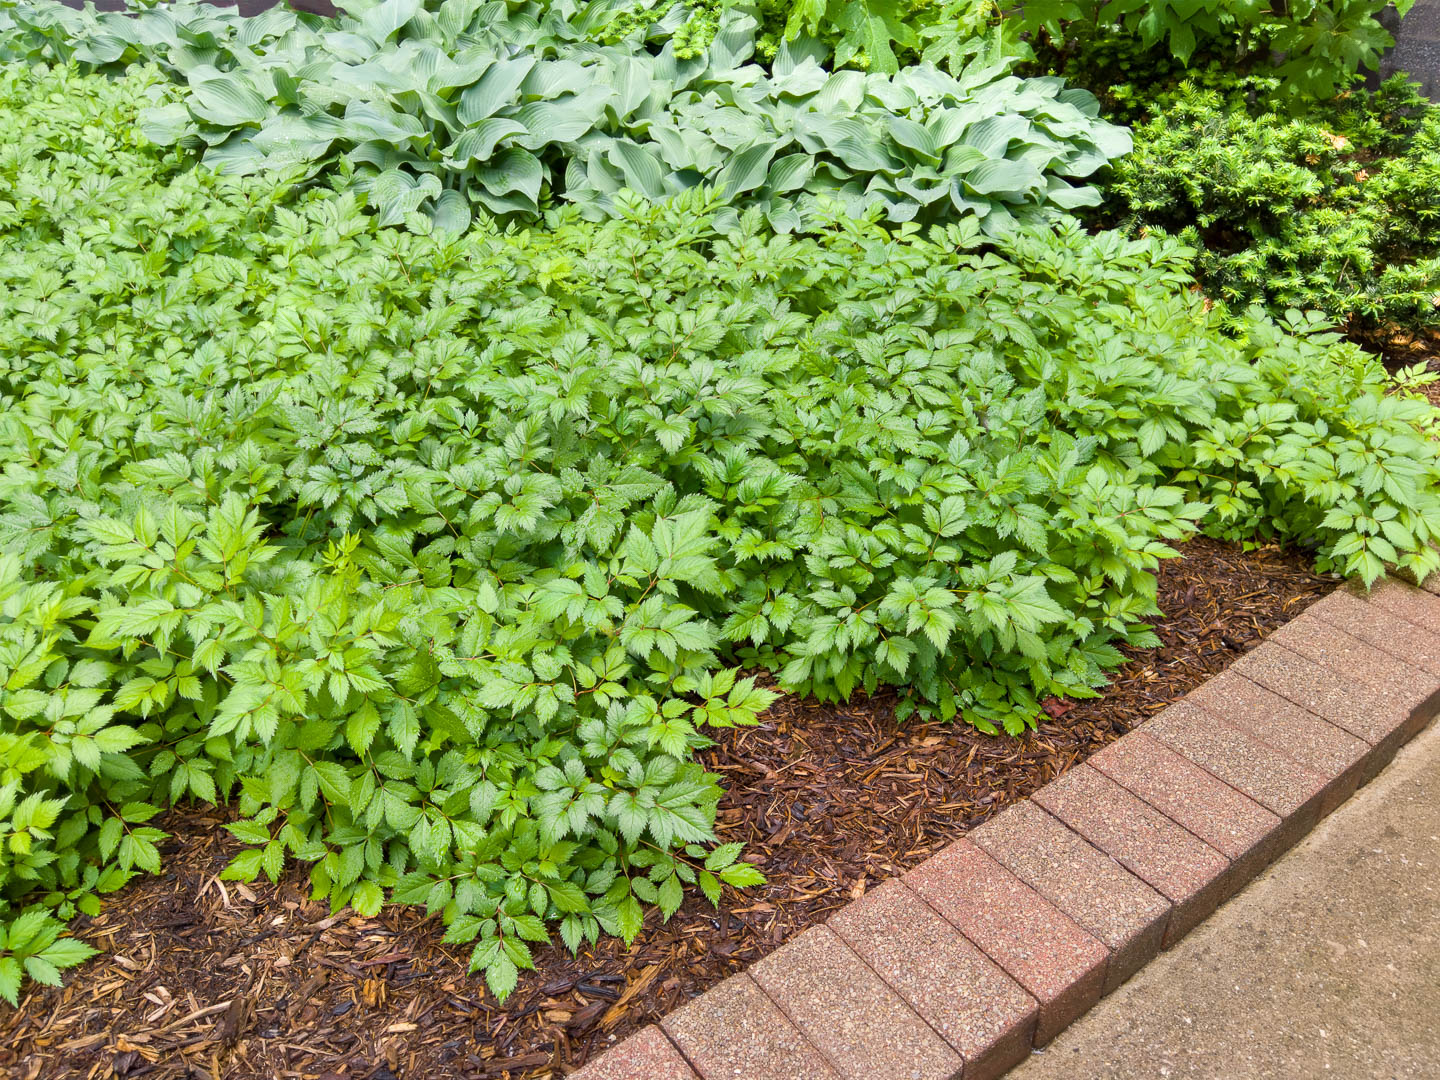
I actually prefer to lay the bricks sideways like this, rather than end to end.
It is more expensive to do it this way (since you need more bricks), but I find the wider edging is more effective at keeping grass from growing under or over it.
Learn how to install brick edging HERE.
Stacked bricks
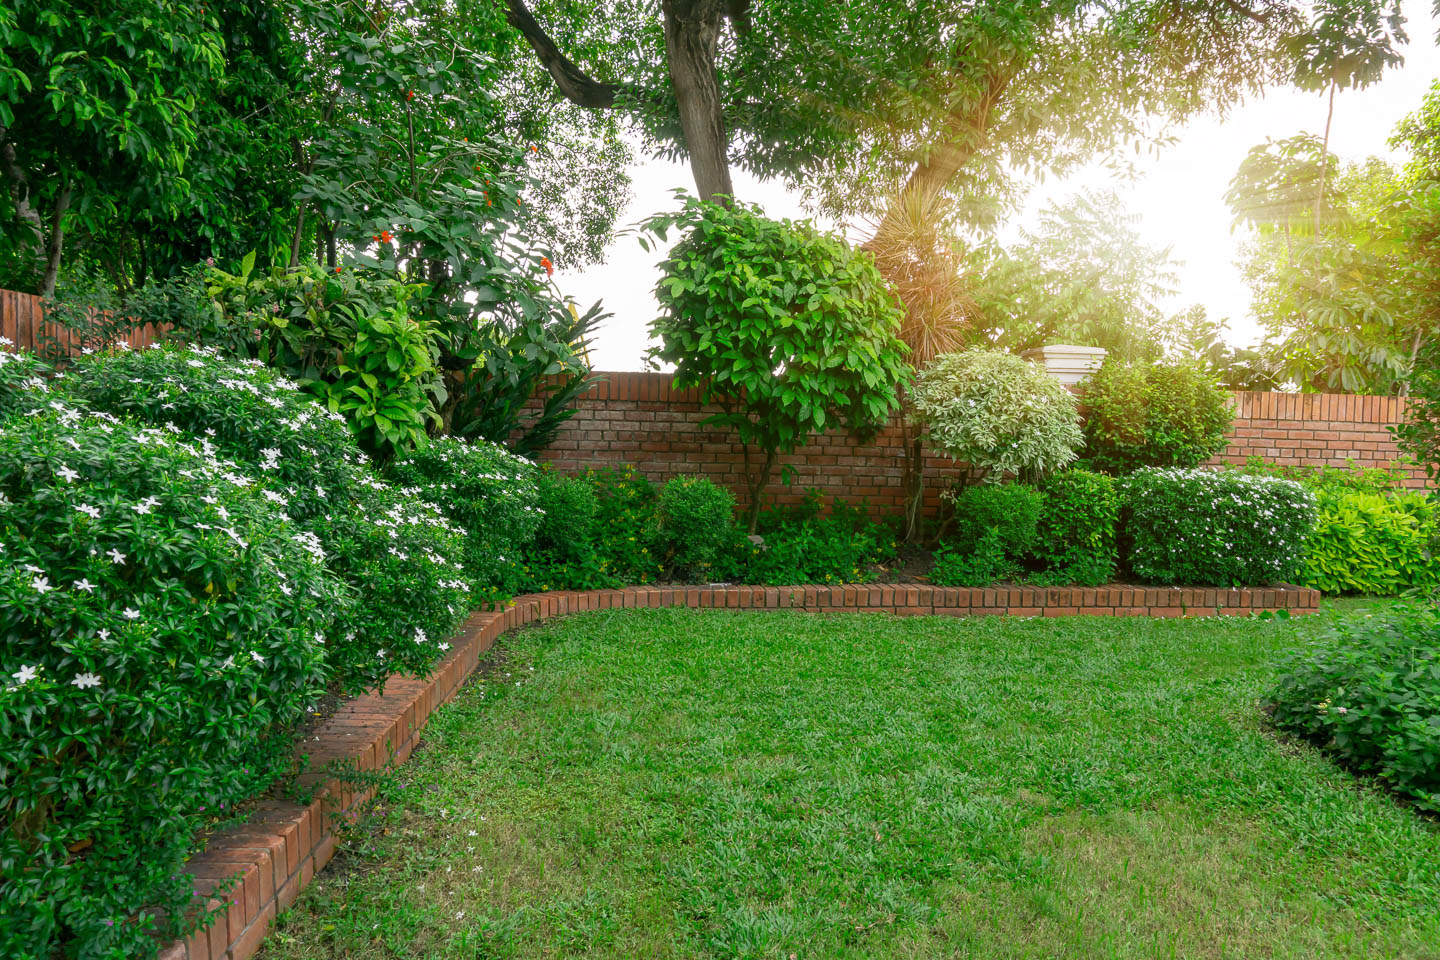
One of the most classic garden edging designs, stacked bricks create a mini wall to separate your garden from grass.
You can have a professional bricklayer install it for you, or you can opt to do it yourself.
Simply stacking the bricks takes no time at all, but they tend to shift around over time if they are not cemented together.
Bricks standing on end
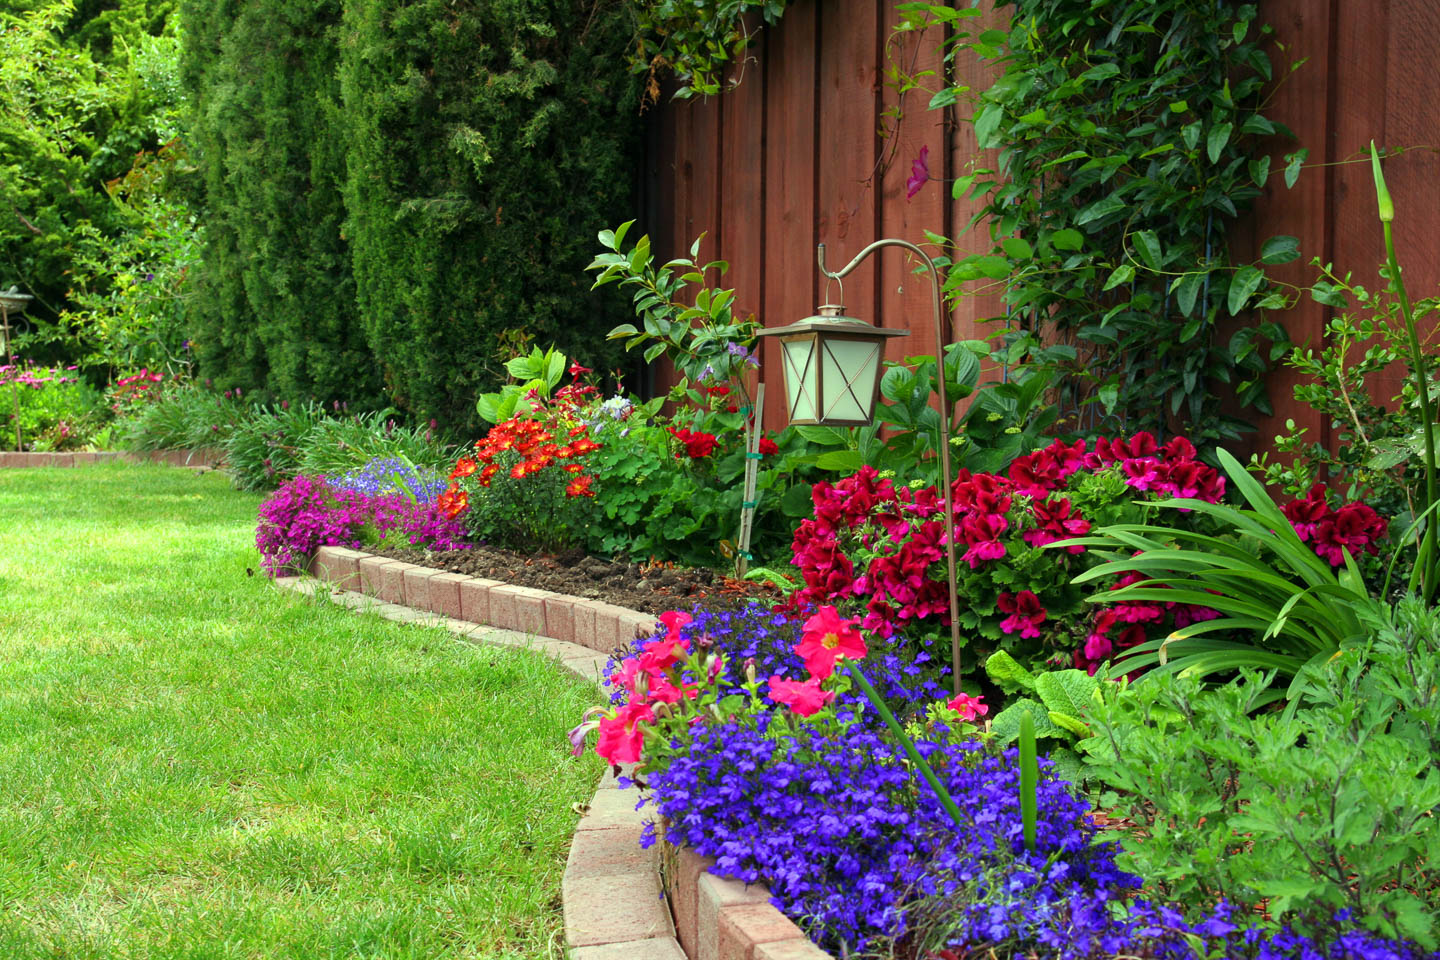
Another way to create a taller edging from bricks is to stand them up on end.
In this case, no cement is required. Bury the bottom half of the brick in the soil and let the top half act as a barrier.
If the edging is bordering the lawn, you might want to put down a row of sunken bricks around the outside to make it easier to mow around the garden bed.
Diagonal (or saw tooth) brick edging
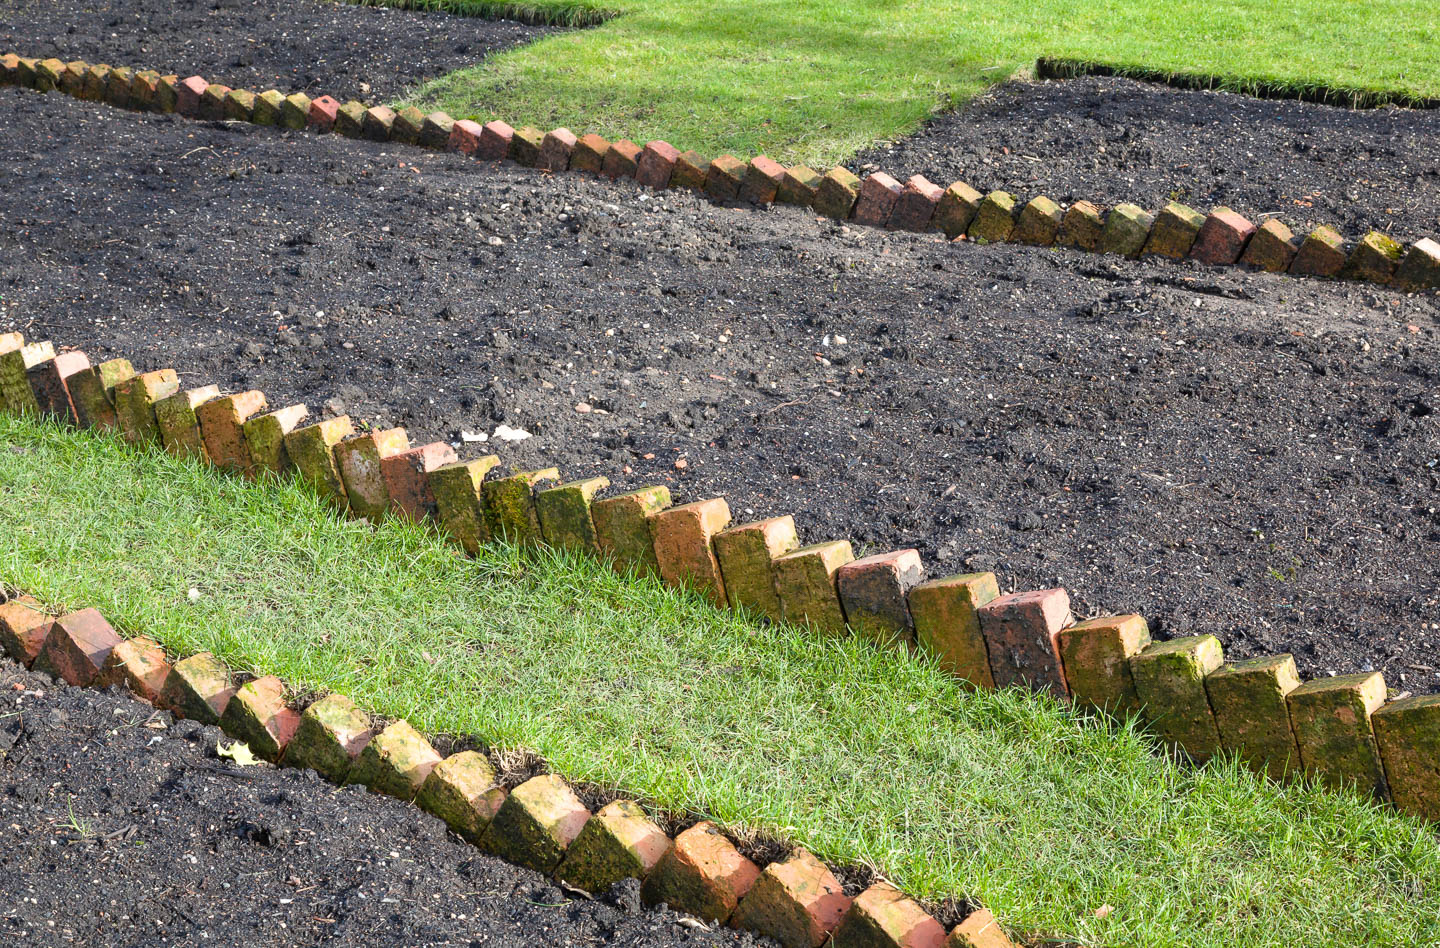
For a different take on standing bricks, try putting them on the diagonal to create a saw tooth edging design.
You'll need to dig a trench.
Then put down the first brick on the angle that you want. Support it with some gravel or dirt to make it stay at the correct angle.
Continue down the line leaning each brick up against the previous one until you get to the end.
2 | Scalloped brick edging
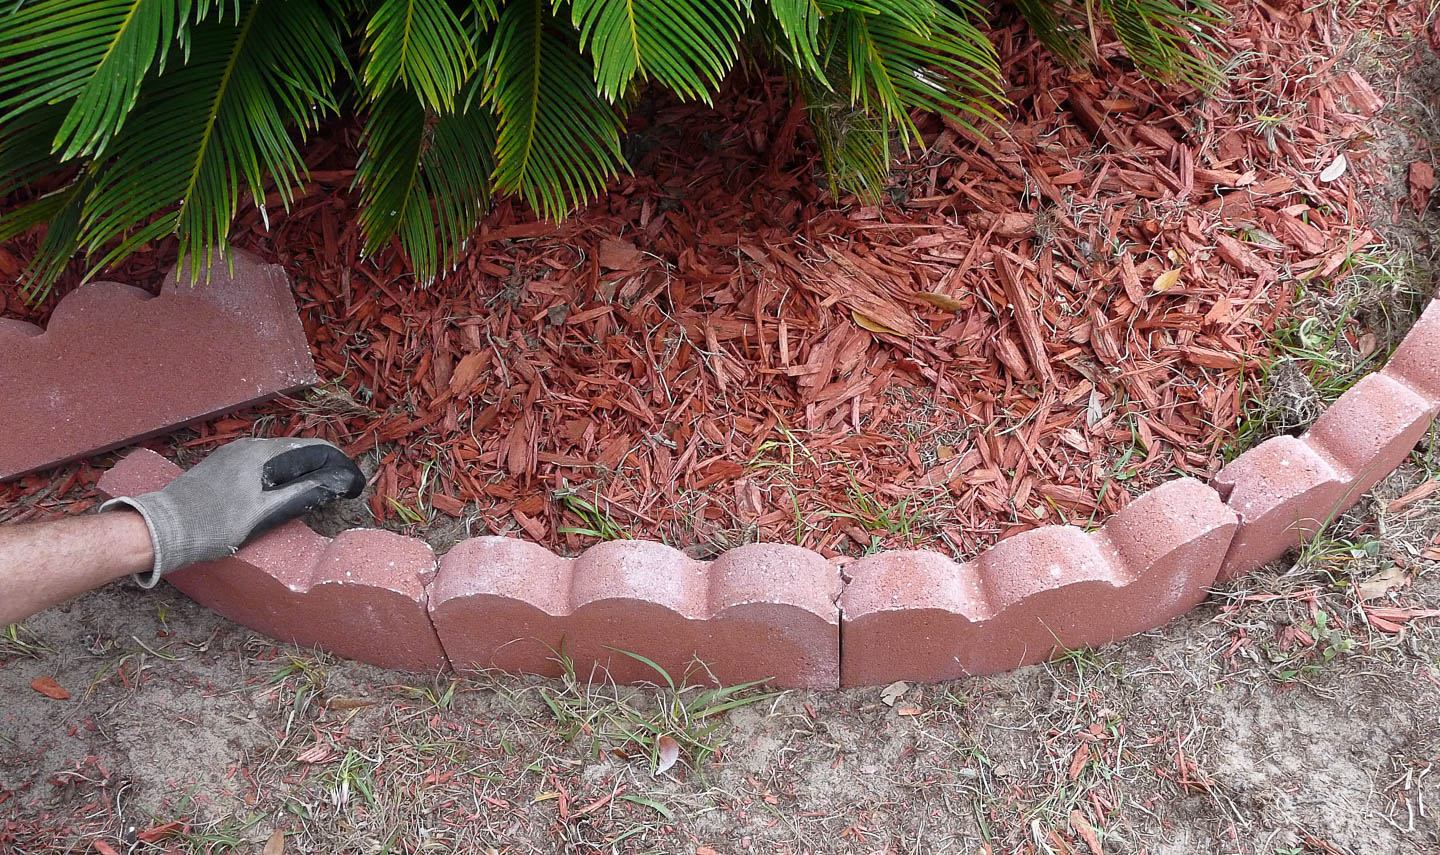
This scalloped brick edging is sold at hardware stores in pieces that are meant to fit together.
As with sunken bricks, you'll need to dig a trench around the outside of your flower bed to put them in.
Then simply set these edging pieces in the ground and fill in around them with dirt.
3 | Cobblestones
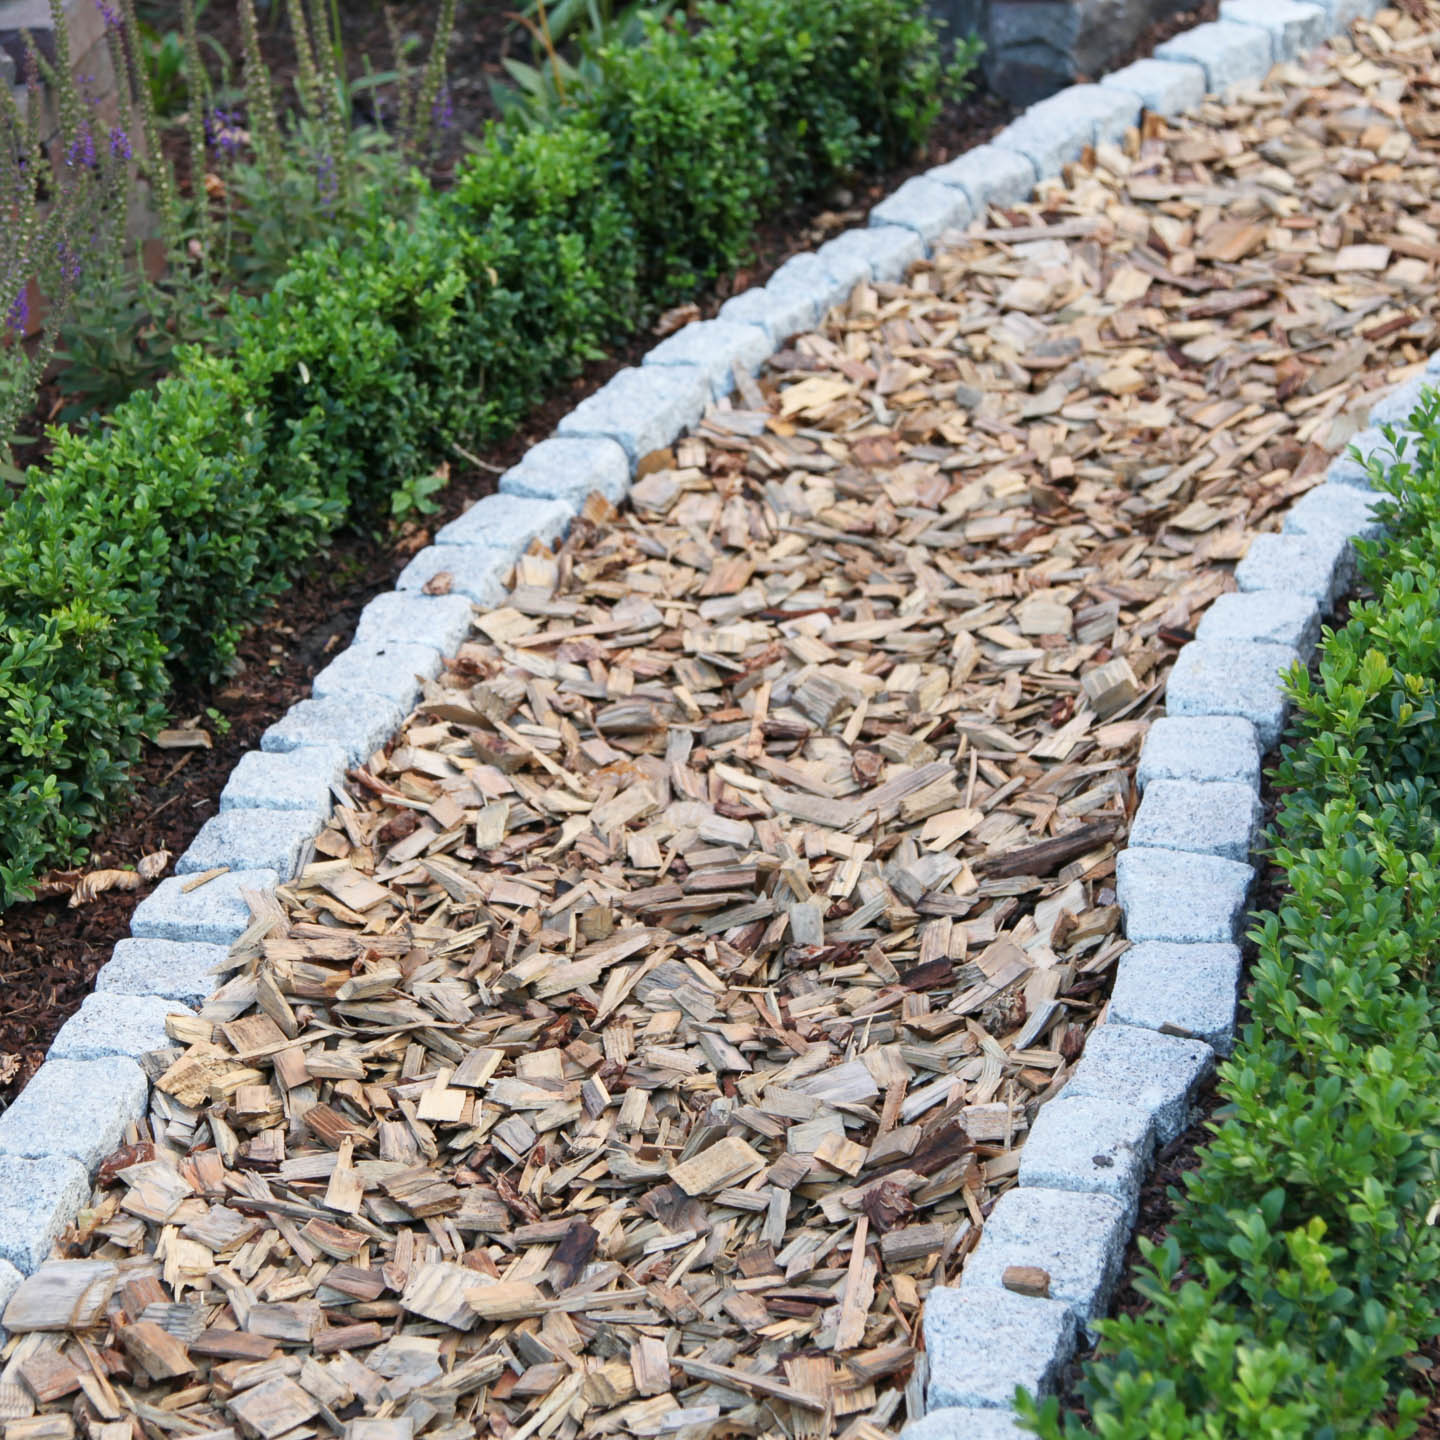
Cobblestones are similar to brick but with more of a square shape. And they don't usually have perfectly square edges.
So they add some character to your landscape edging.
If you don't want to deal with the heavy lifting of installing the real thing, you can buy a faux stone border*. It's made from plastic and actually looks quite realistic.
4 | Small rocks
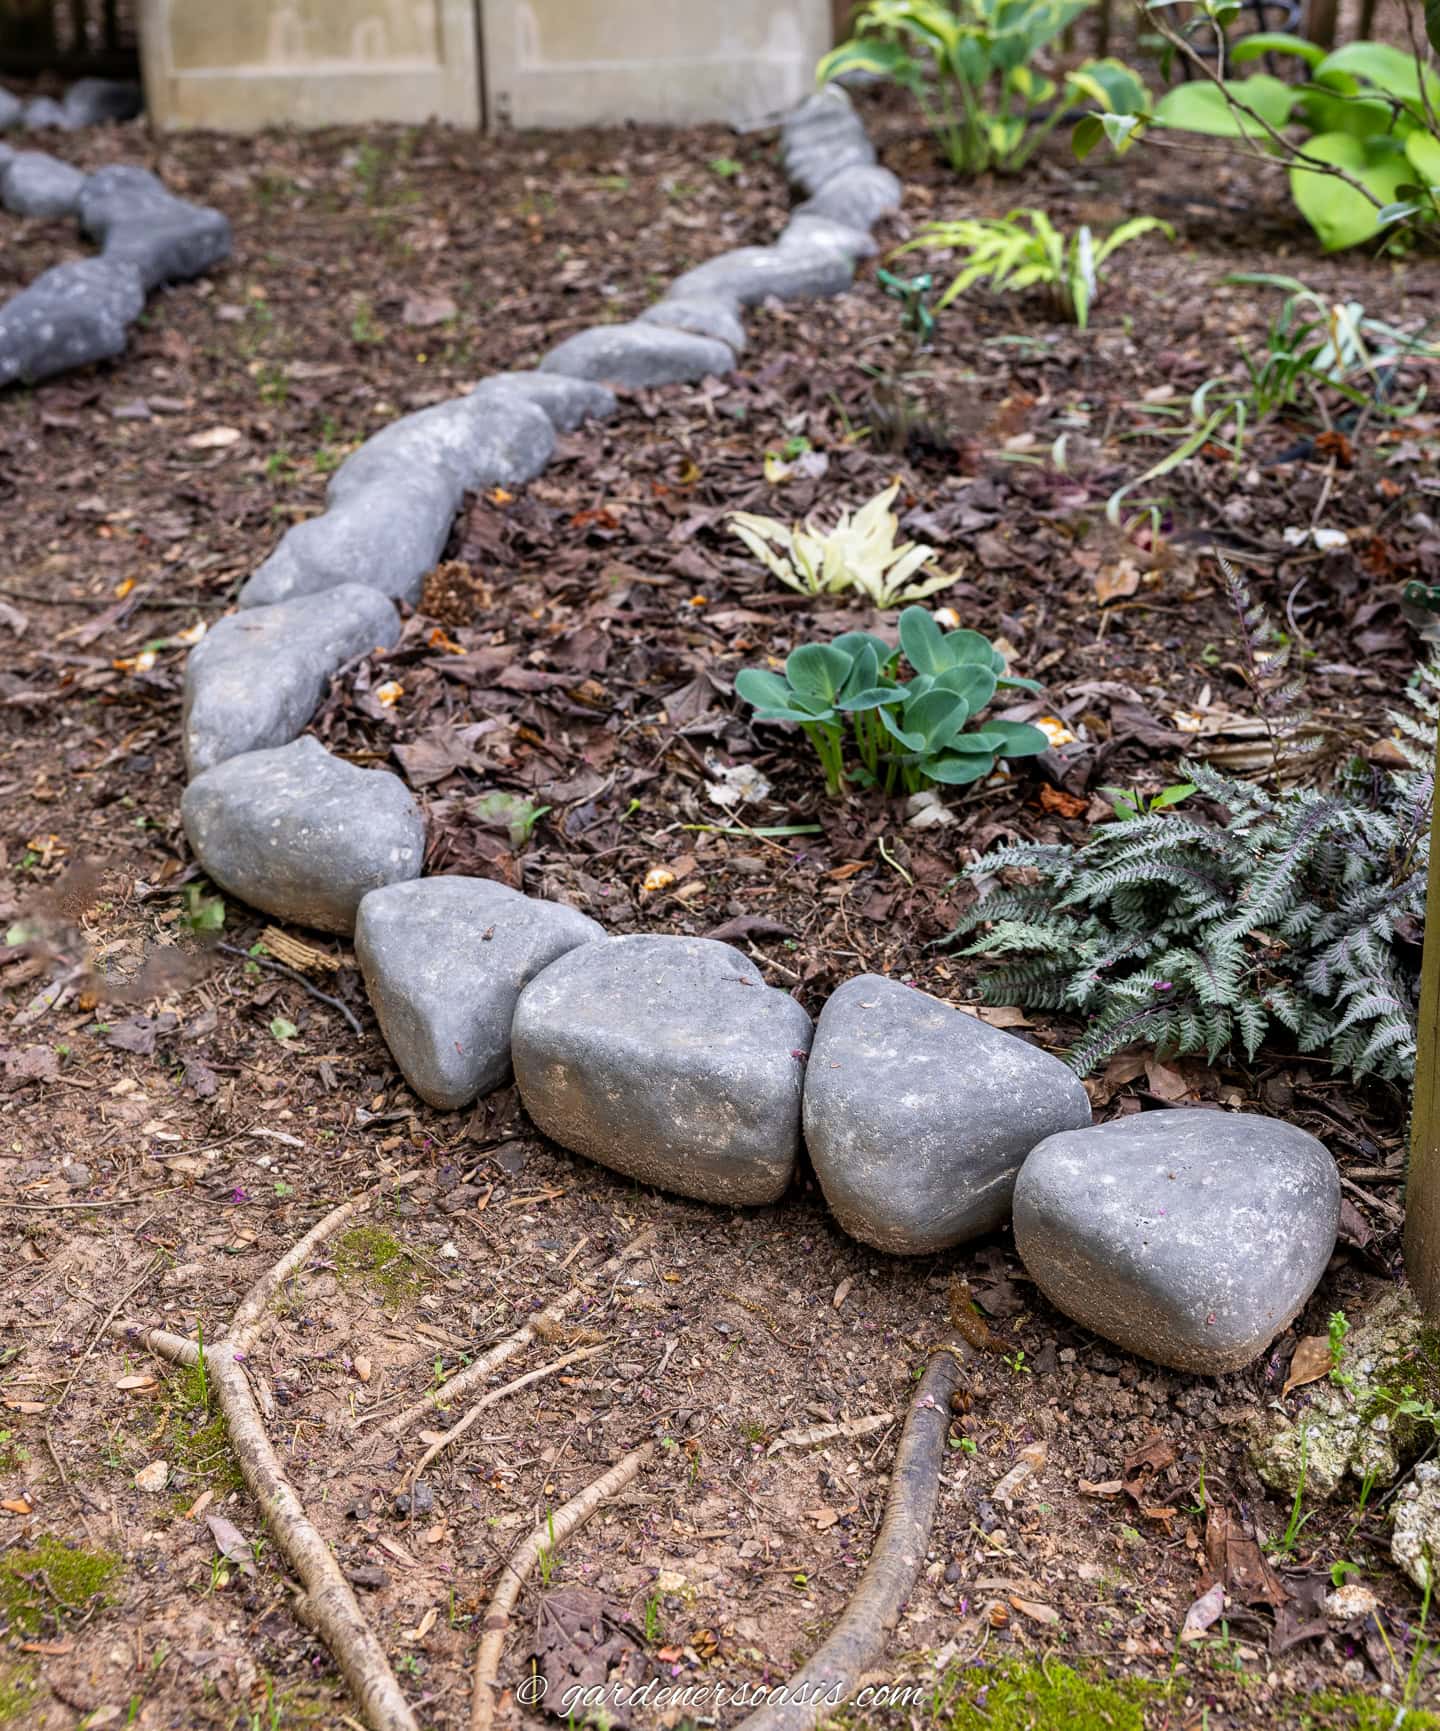
For a less formal look, you can use 6-inch to 9-inch rocks to create an edging similar to cobblestones.
I actually used these faux stones* to create the edging above.
They are made with crushed stone so they are very realistic looking. But are much lighter and easier to position than the real thing.
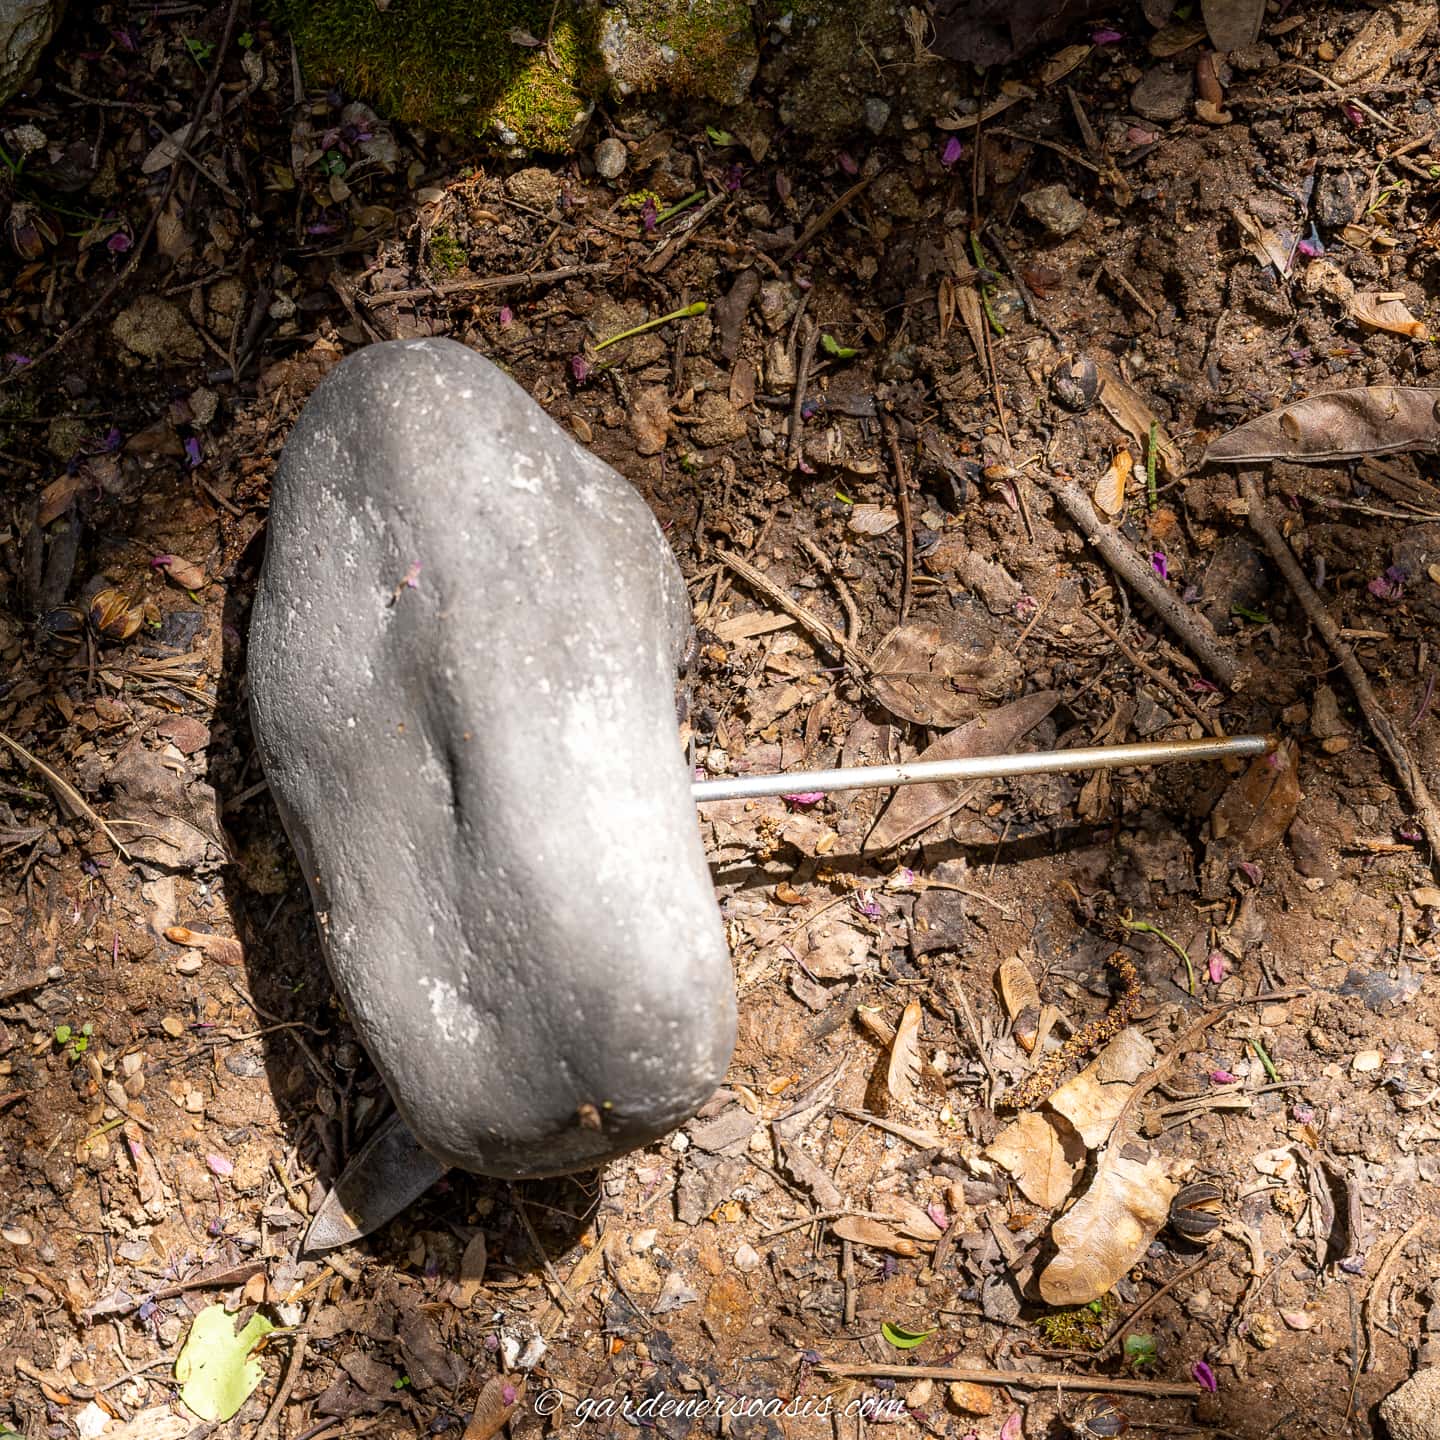
Each of the stones has a small stake that is screwed into the bottom.
So they stay exactly where you put them.
And each package comes with 14 different designs so they don't look all the same.
5 | Flagstone garden edging
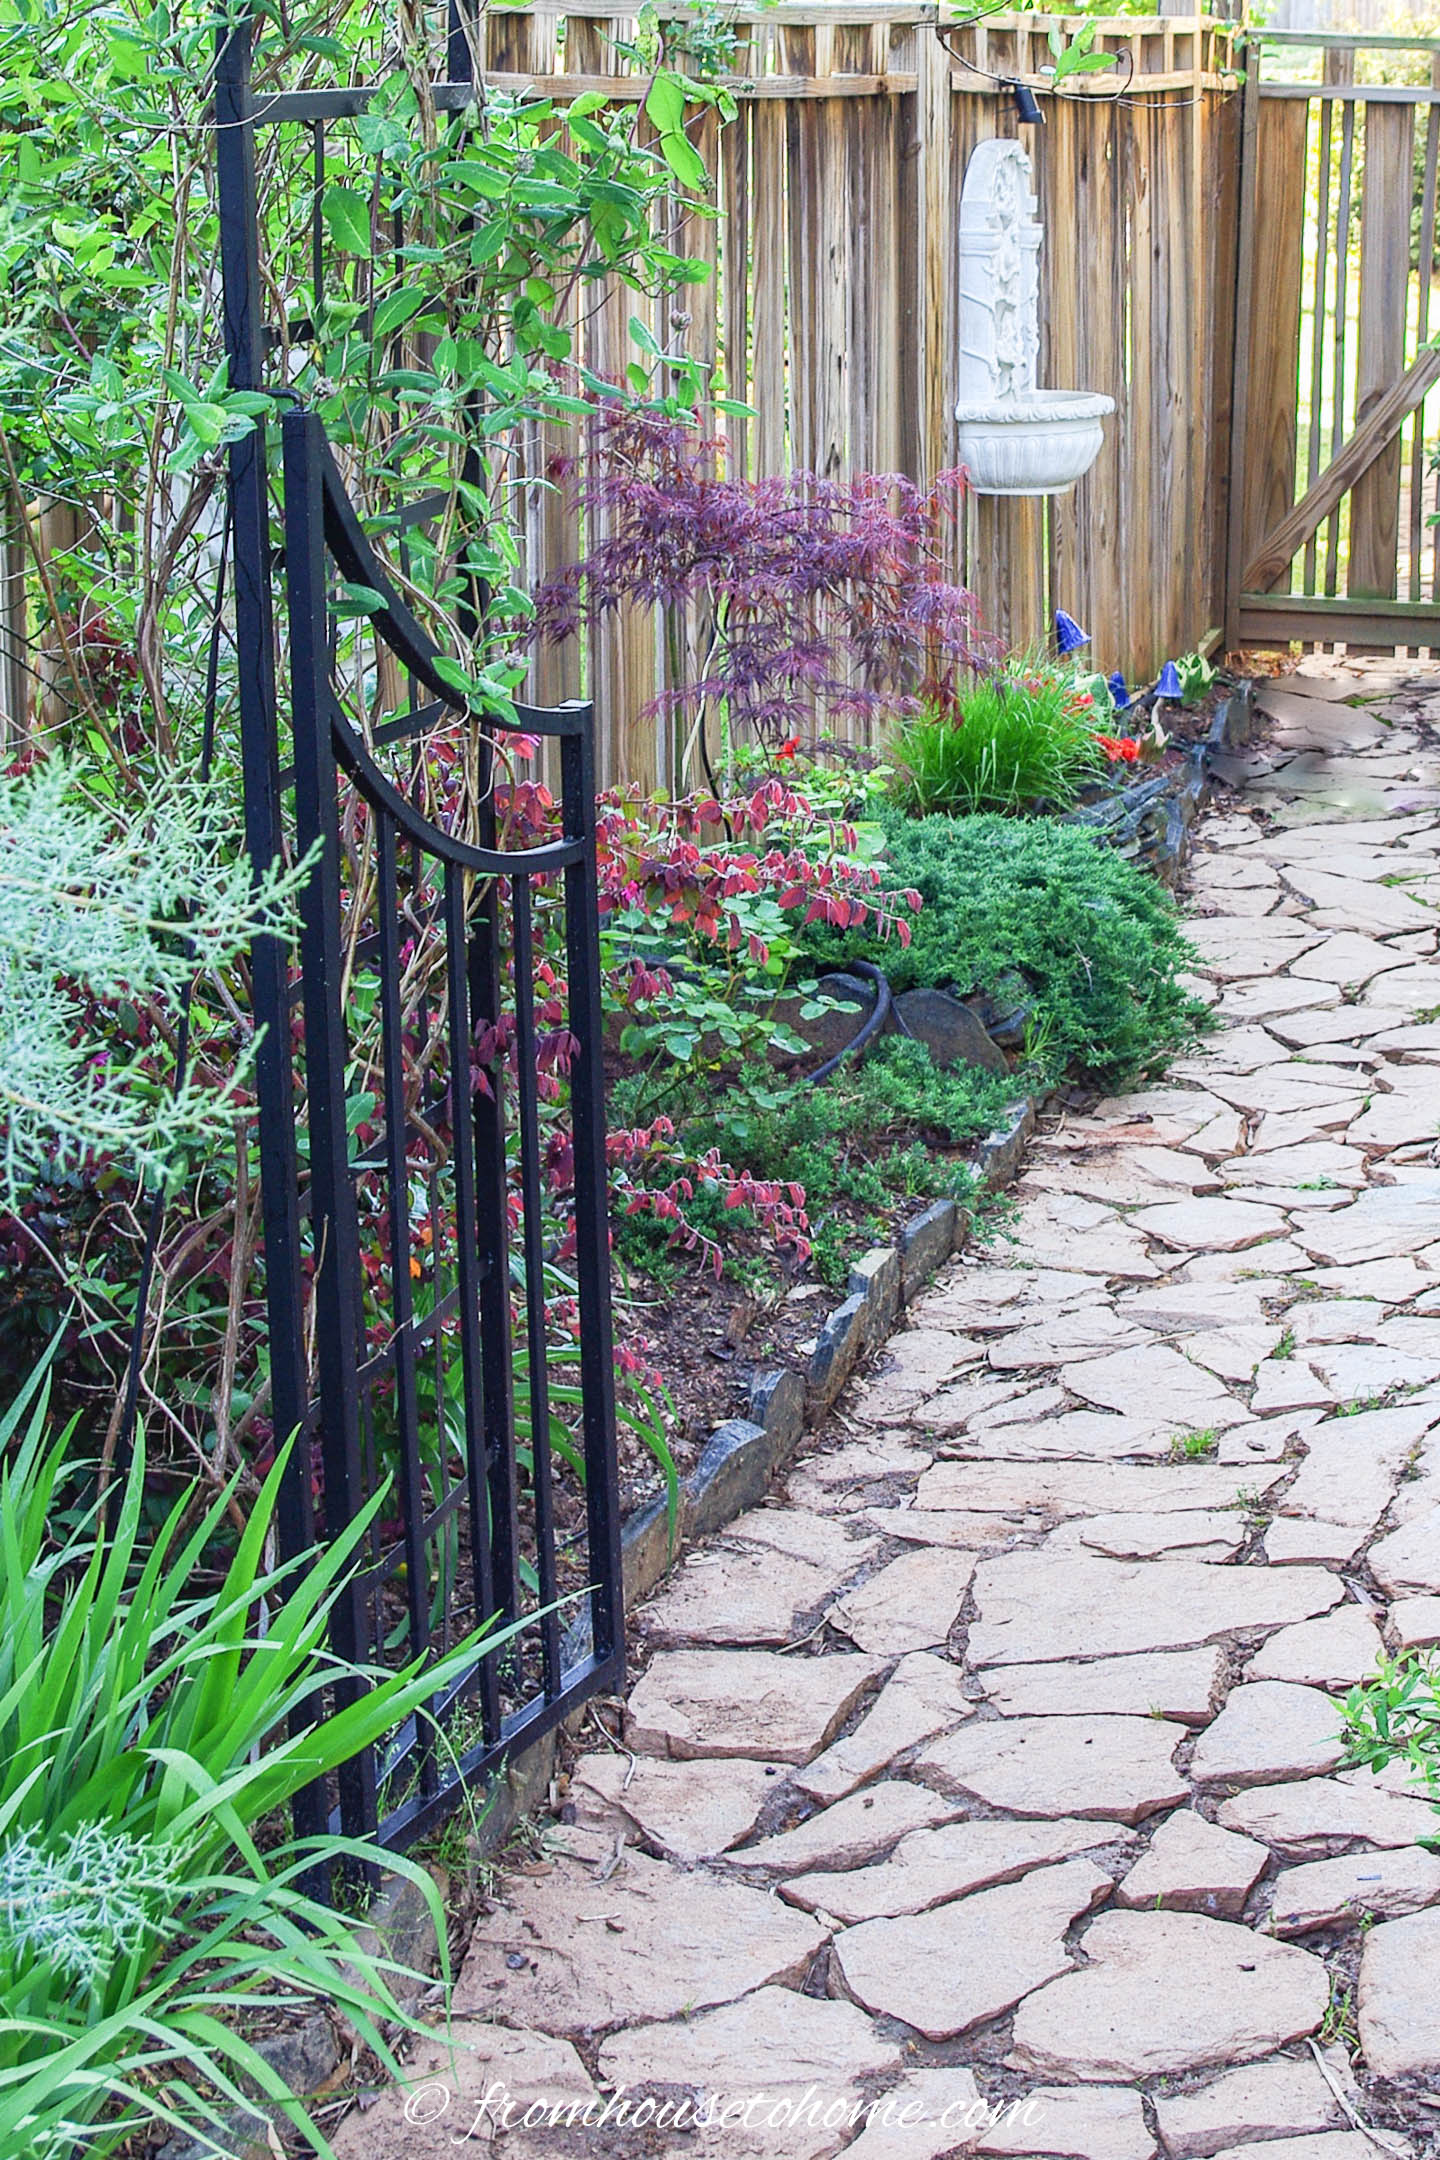
When it comes to stone garden edging, you can get completely different looks simply based on the type of stone you choose.
I have a thing for flagstones, so almost all of my garden beds are edged with it.
In some sections, I dug a little trench and stood them up on end, like the picture above.
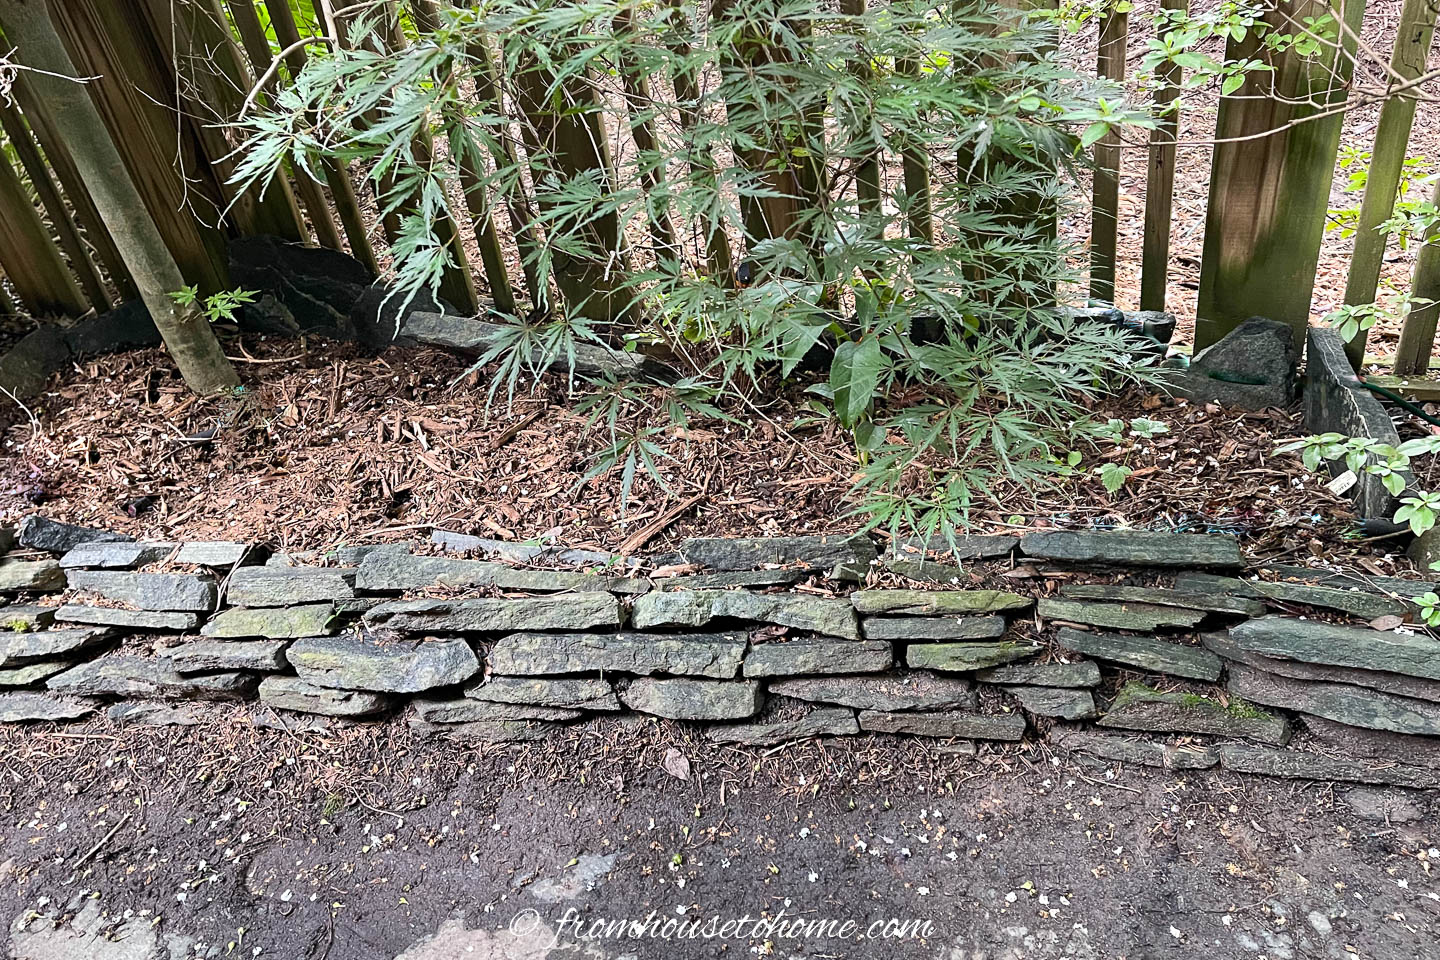
In other sections where I wanted to add a little more soil, I dry-stacked them.
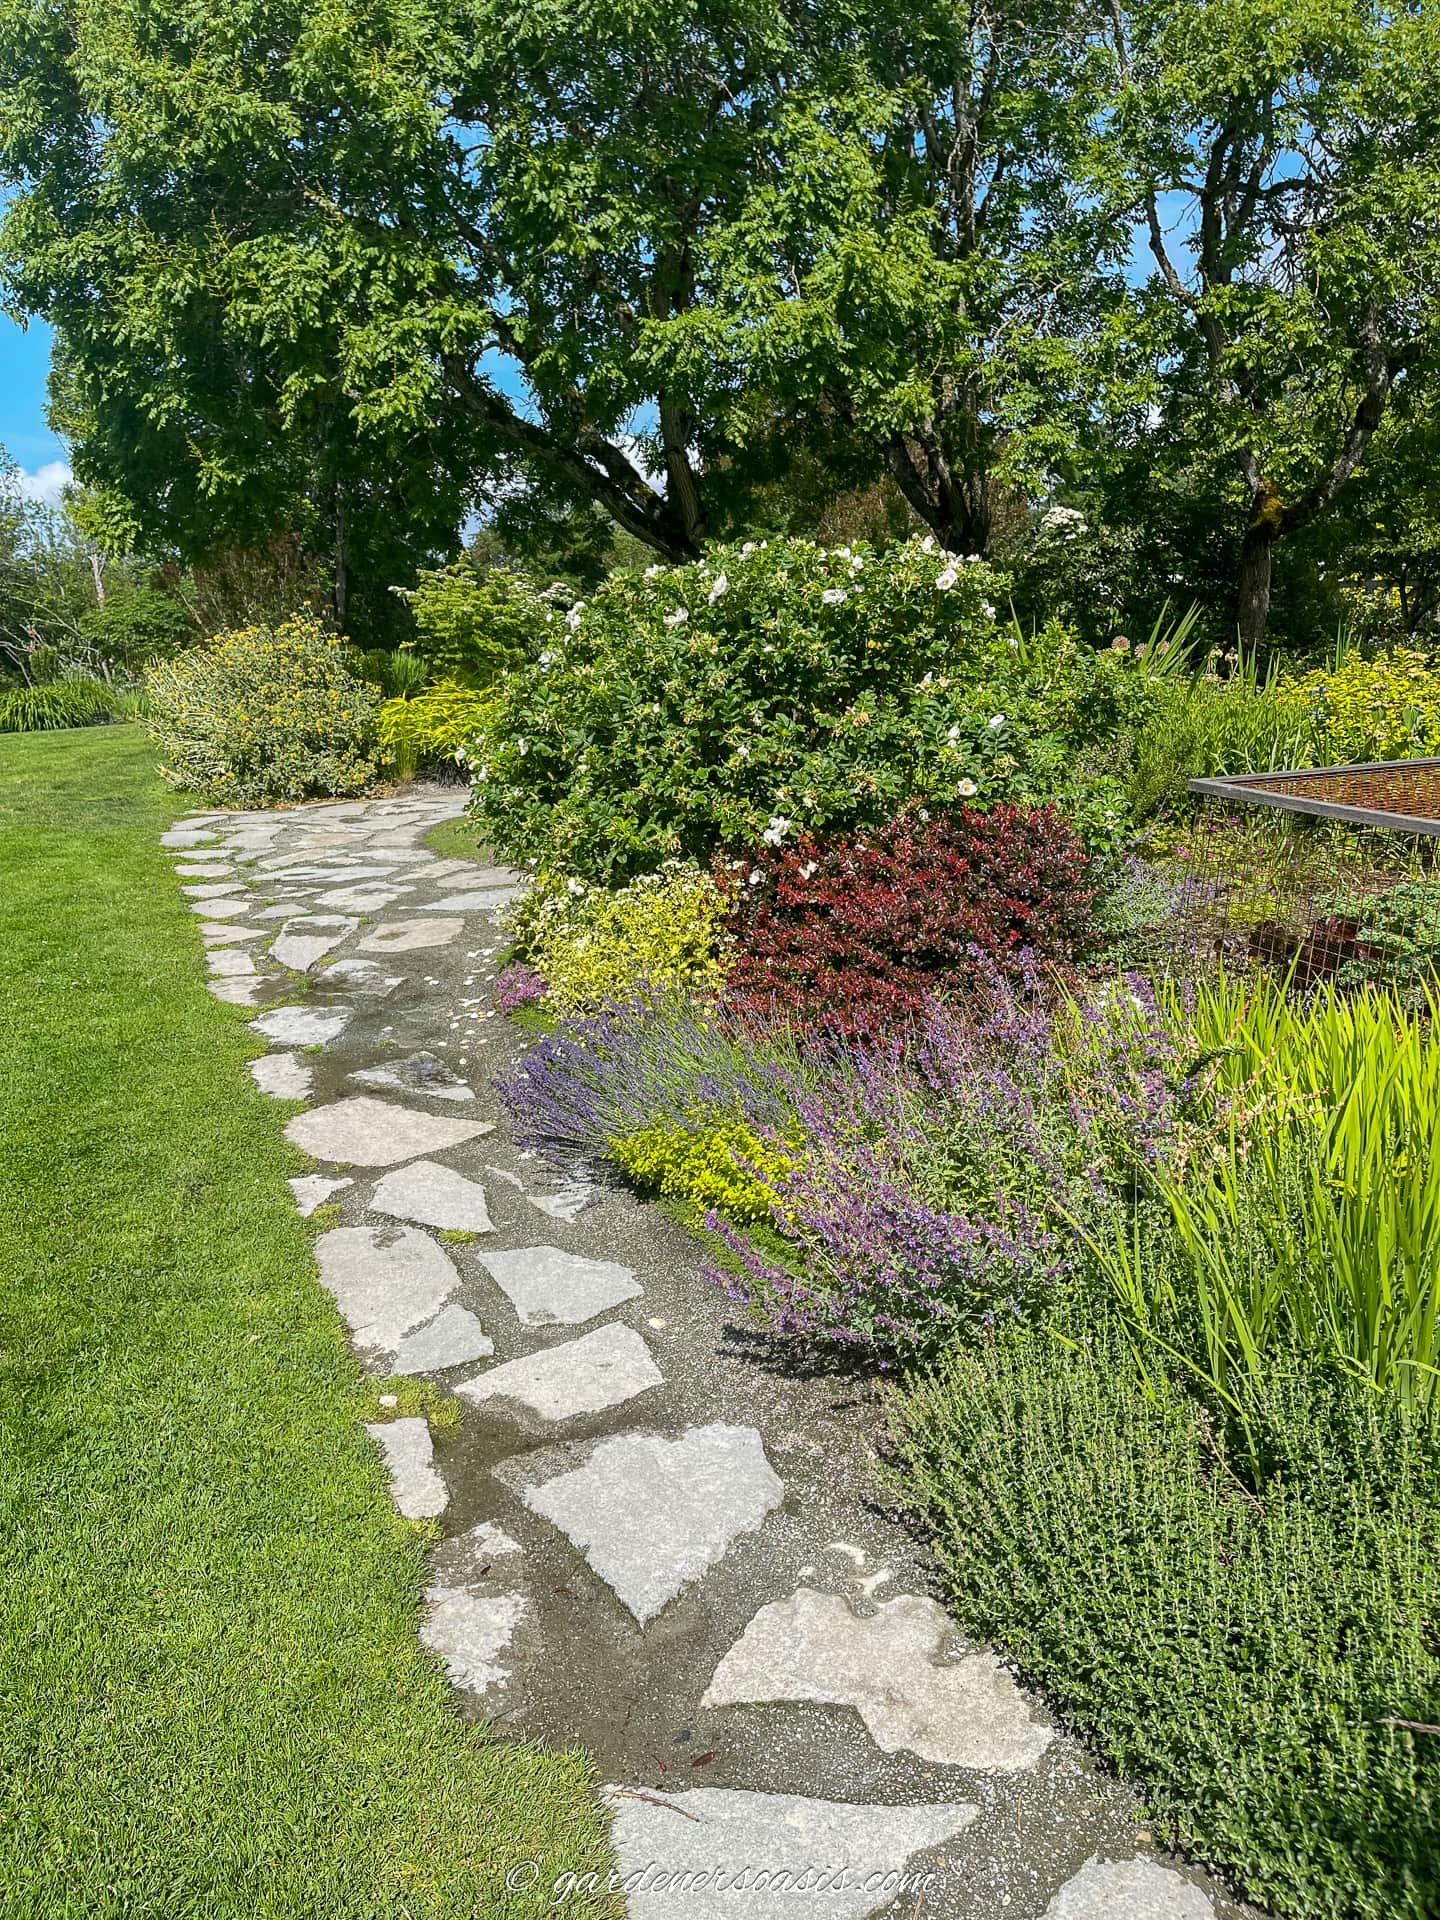
You could also lay them down flat to create a mowing edge just like you would with bricks.
6 | Slate landscape edging
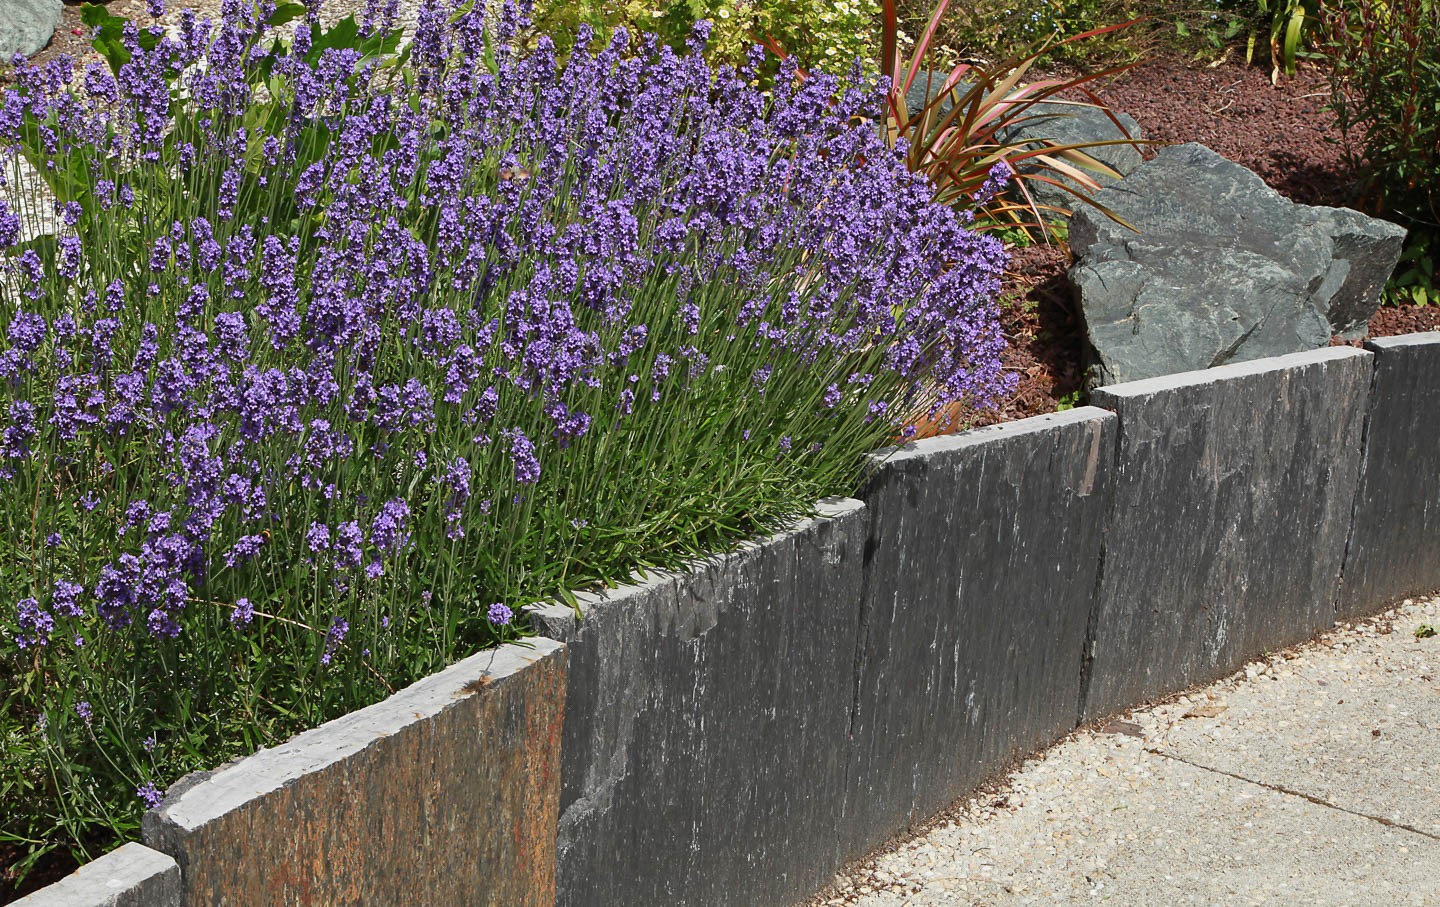
Using pieces of slate or large tiles creates a more structured-looking edge to your garden border.
As with flagstones and bricks, slate can be stood up on end, stacked or laid flat depending on the look and functionality you are going for.
7 | Boulders
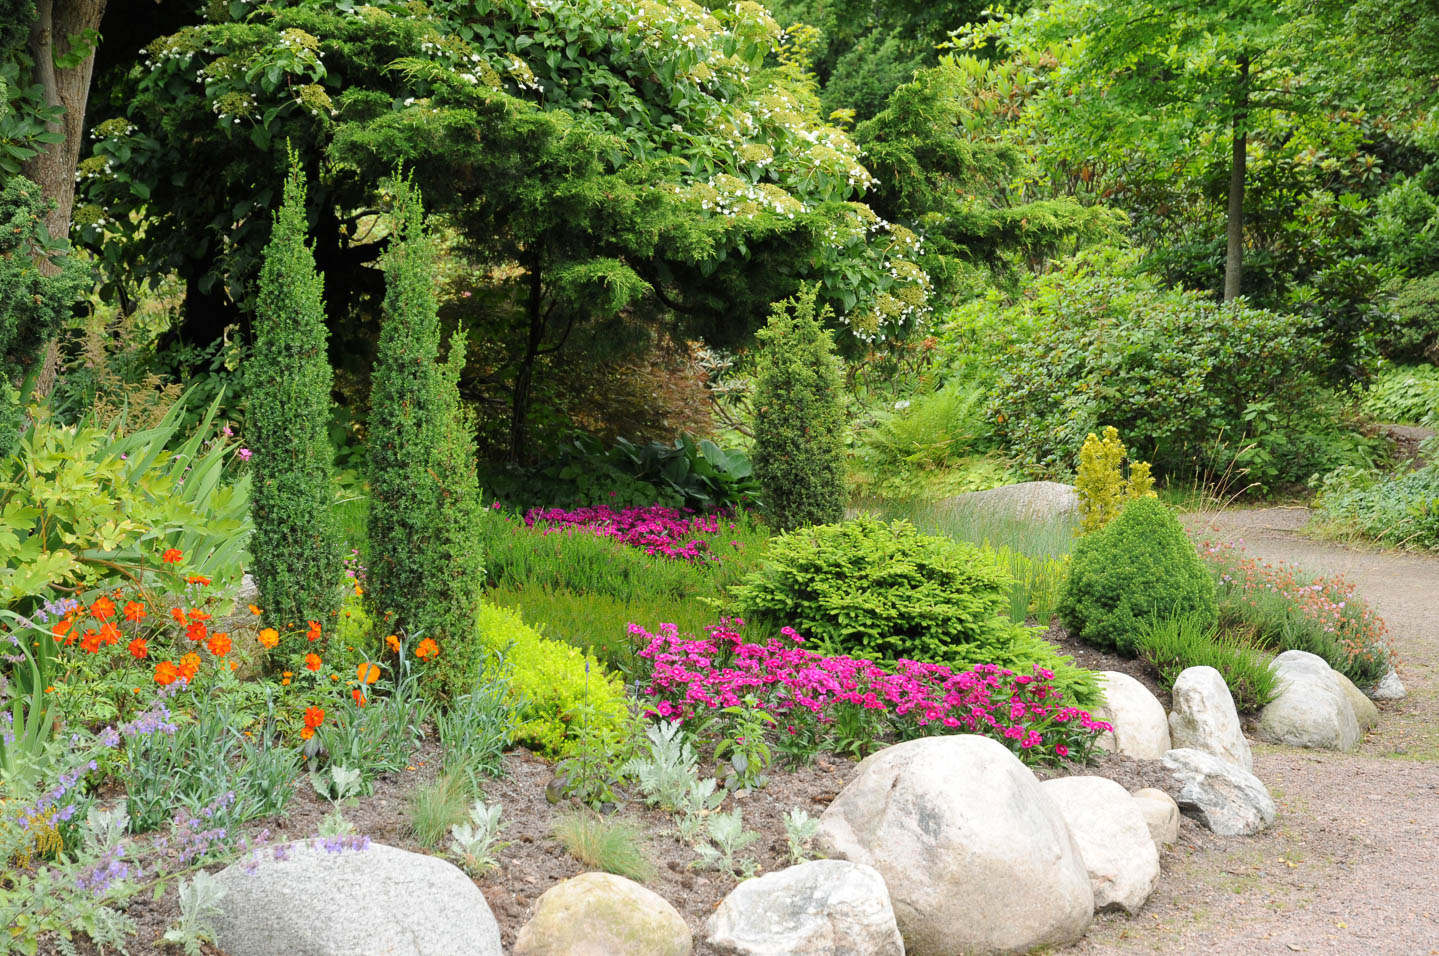
For a less formal look, get some boulders.
While they make be difficult to transport, simply placing a line of rocks 1 foot high along the edge of the garden is all you need to do.
Round boulders will create a more uniform look, while jagged rocks make the design more rugged.
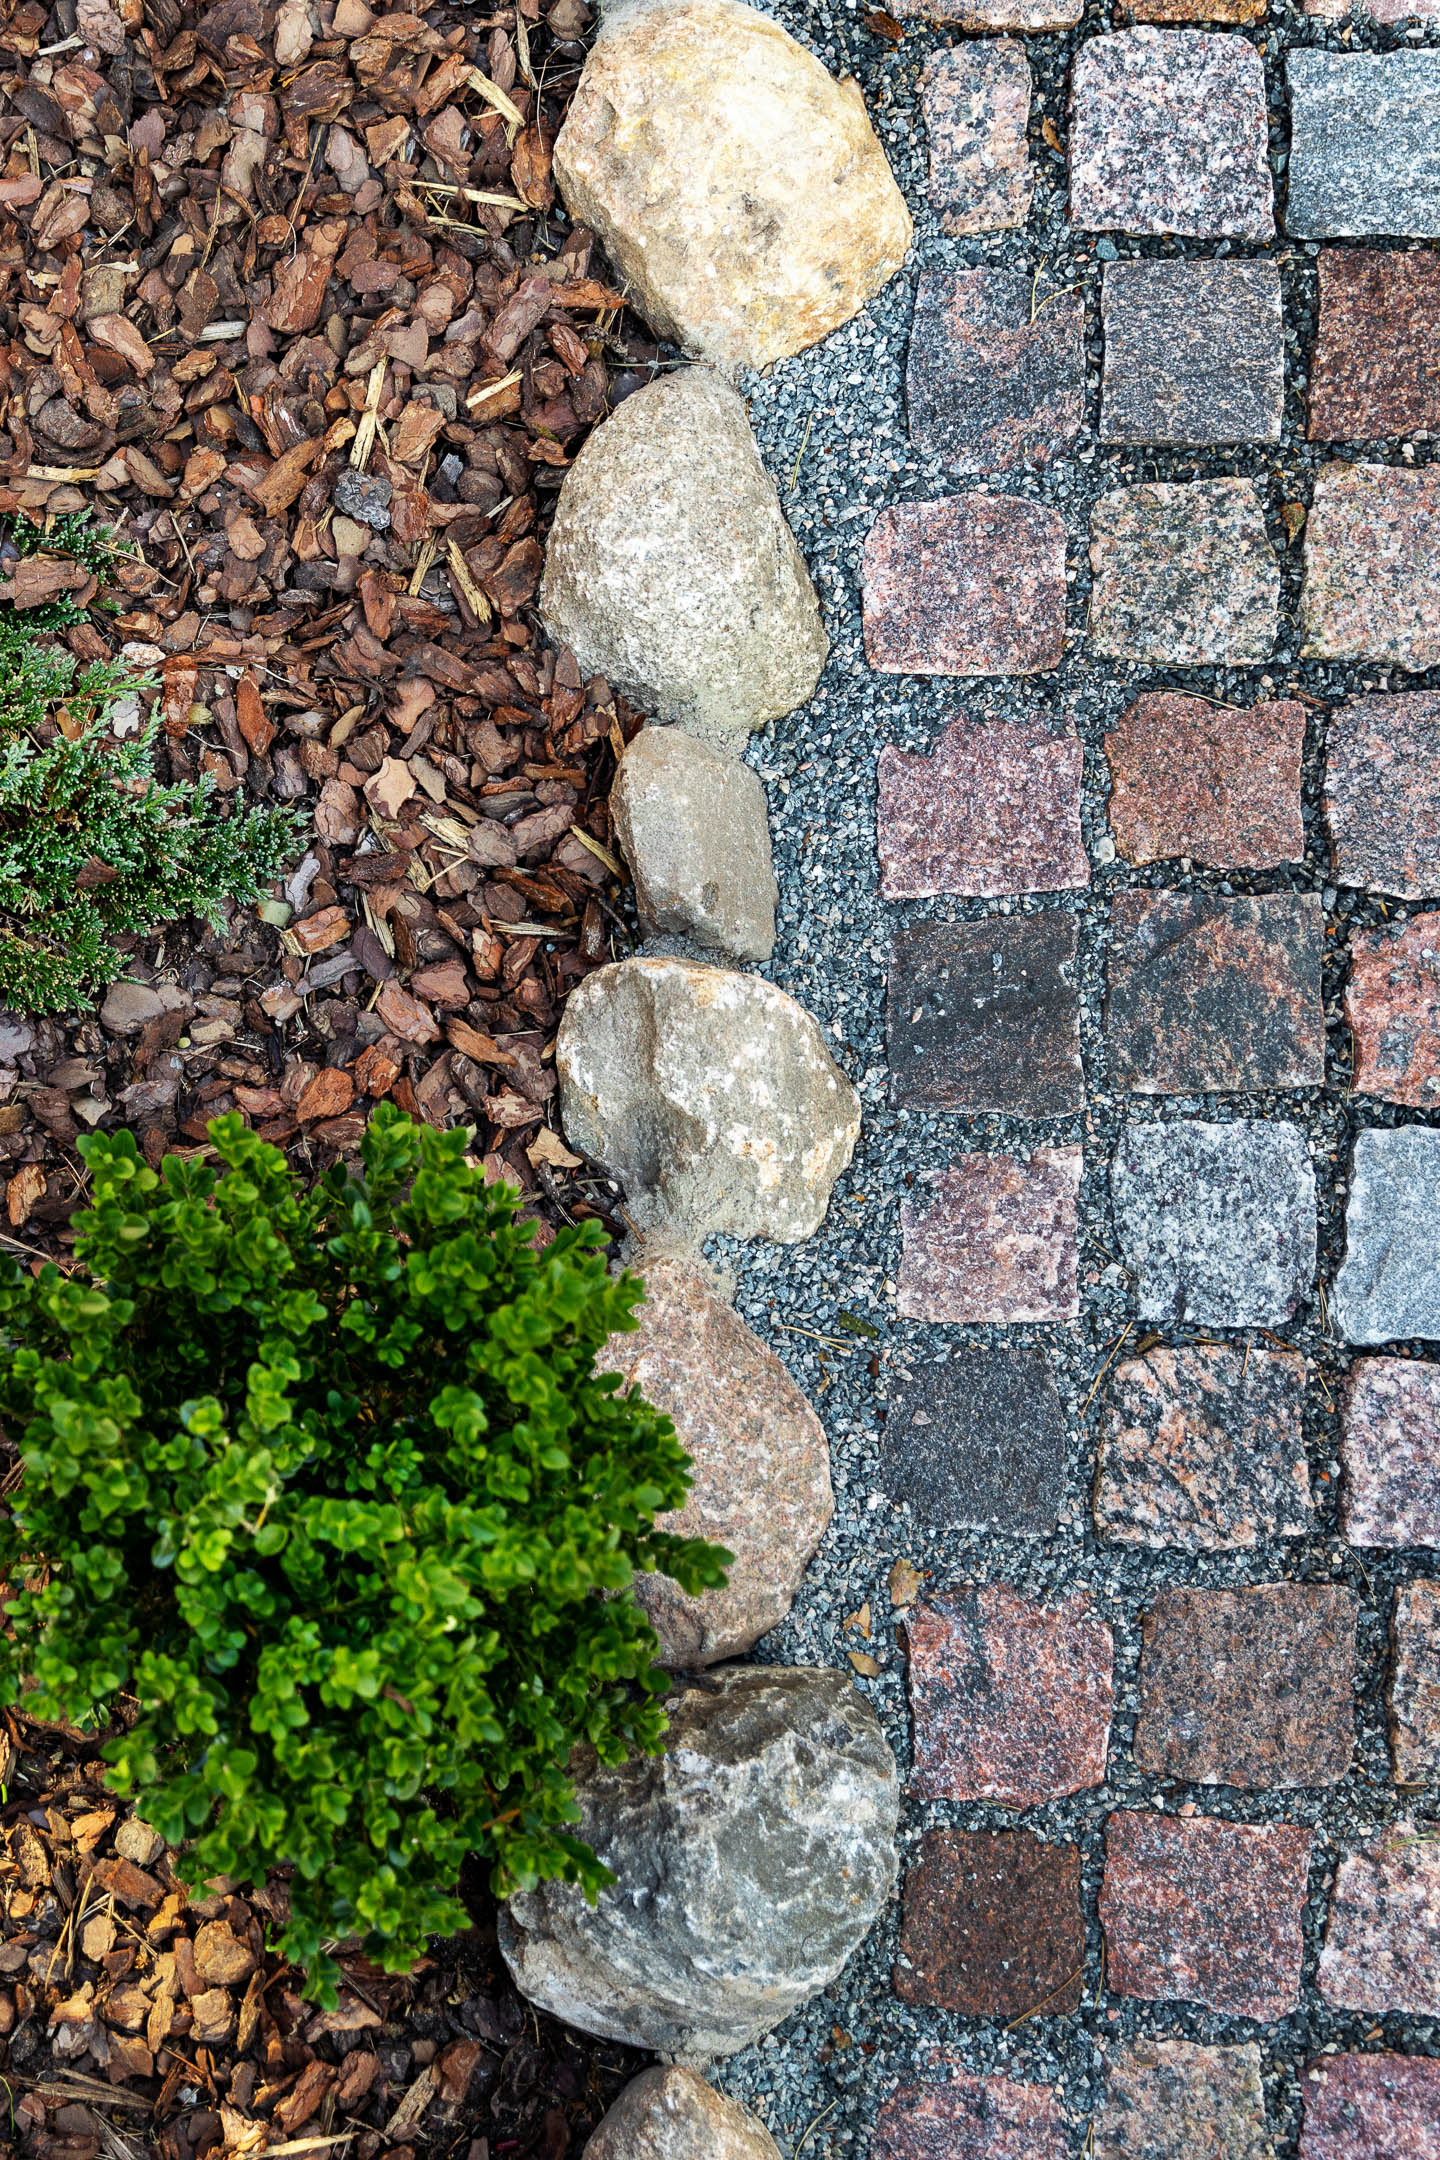
Like bricklaying, you can also place sunken rocks as a border for your garden.
This helps to keep smaller plants from being blocked, and makes it harder for roots to grow under them.
If you're putting this rock edging in beside a pathway, fill in the gaps using the same sand, gravel or concrete to give the edging a cohesive look.
8 | Cut stone edging
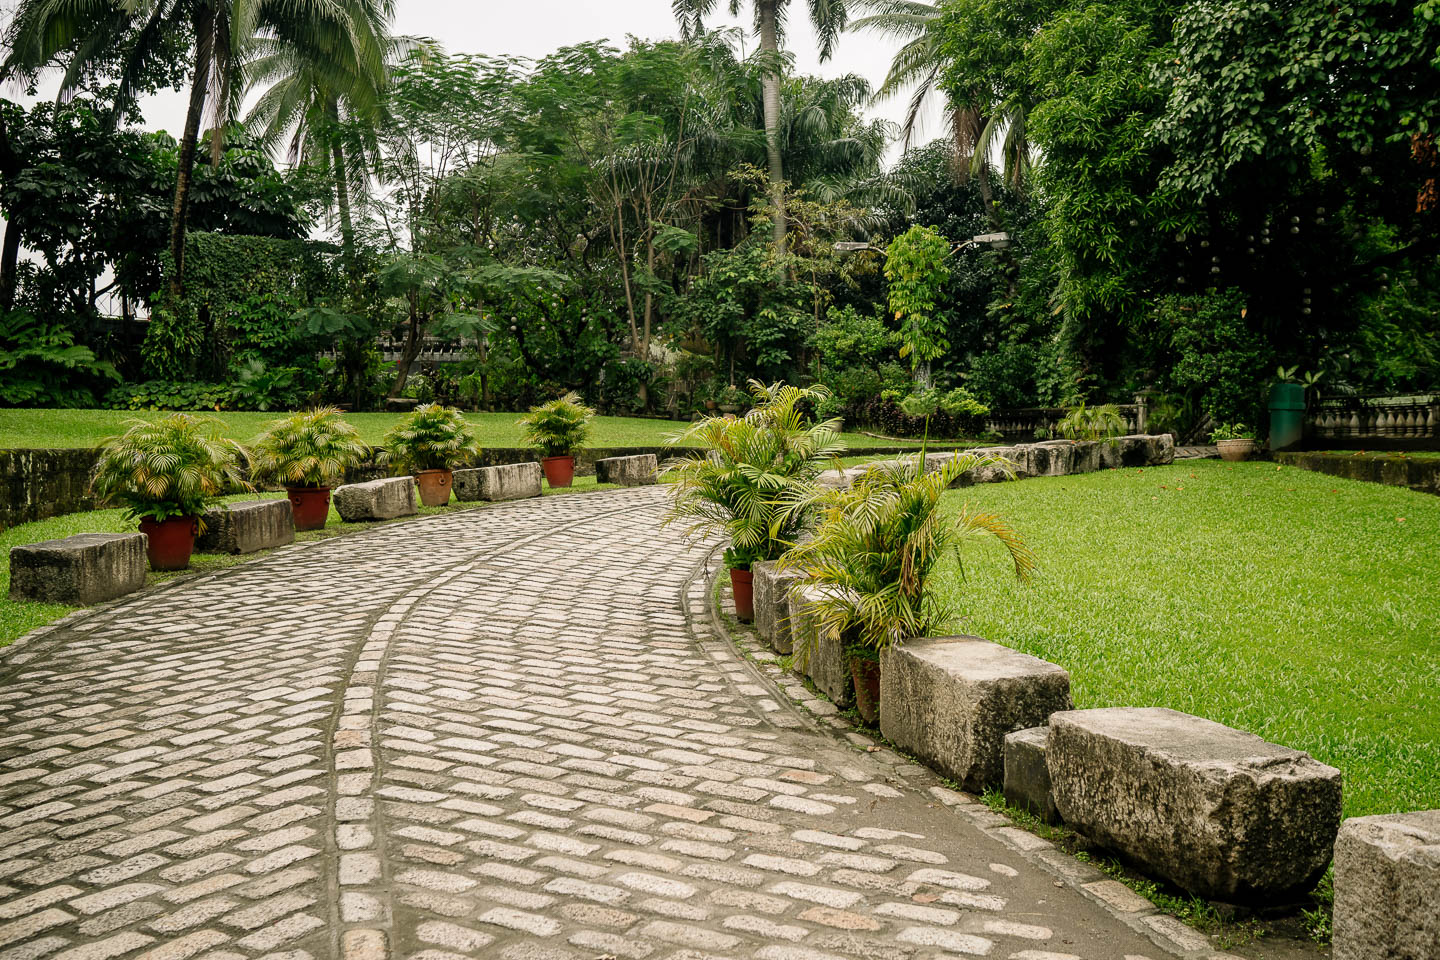
If you like a more formal look and don't mind some really heavy lifting, use large rectangular cut stones for edging that can also double as benches.
Alternating them with smaller square stones and large potted plants keeps it from feeling like a wall.
9 | Gravel
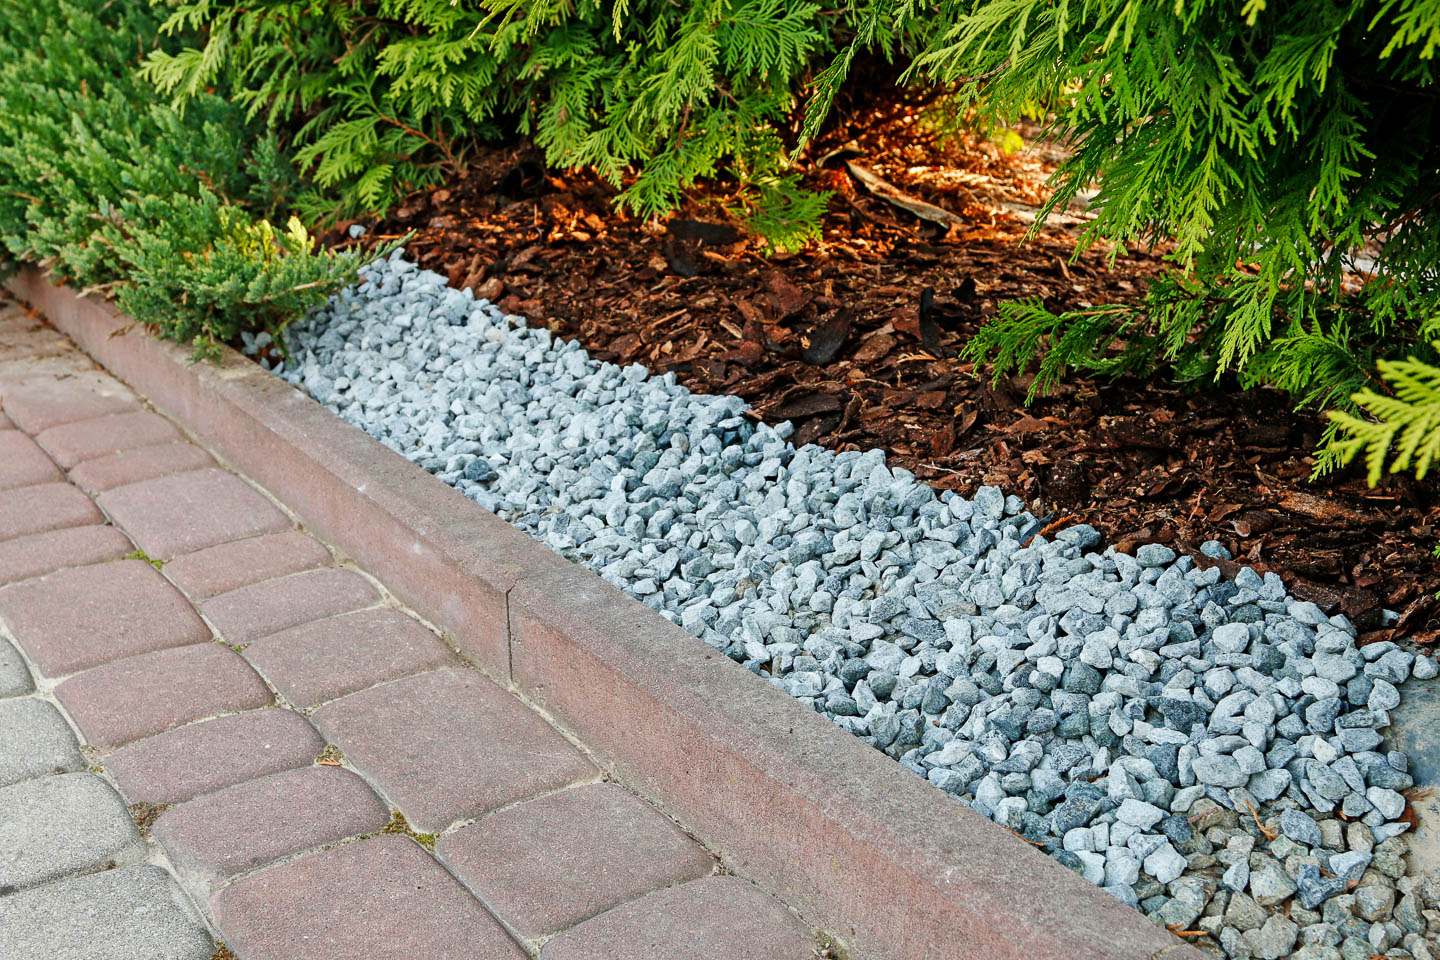
A wide gravel edge will help to keep the weeds down, make a good mowing edge and prevent grass from growing into your garden bed.
To keep the gravel in its place and make it harder for roots to grow under it, dig a 3-inch to 4-inch deep trench before pouring the stones in.
The other great thing about gravel? It can easily go around curves or any special border shapes you may have created in your garden design.
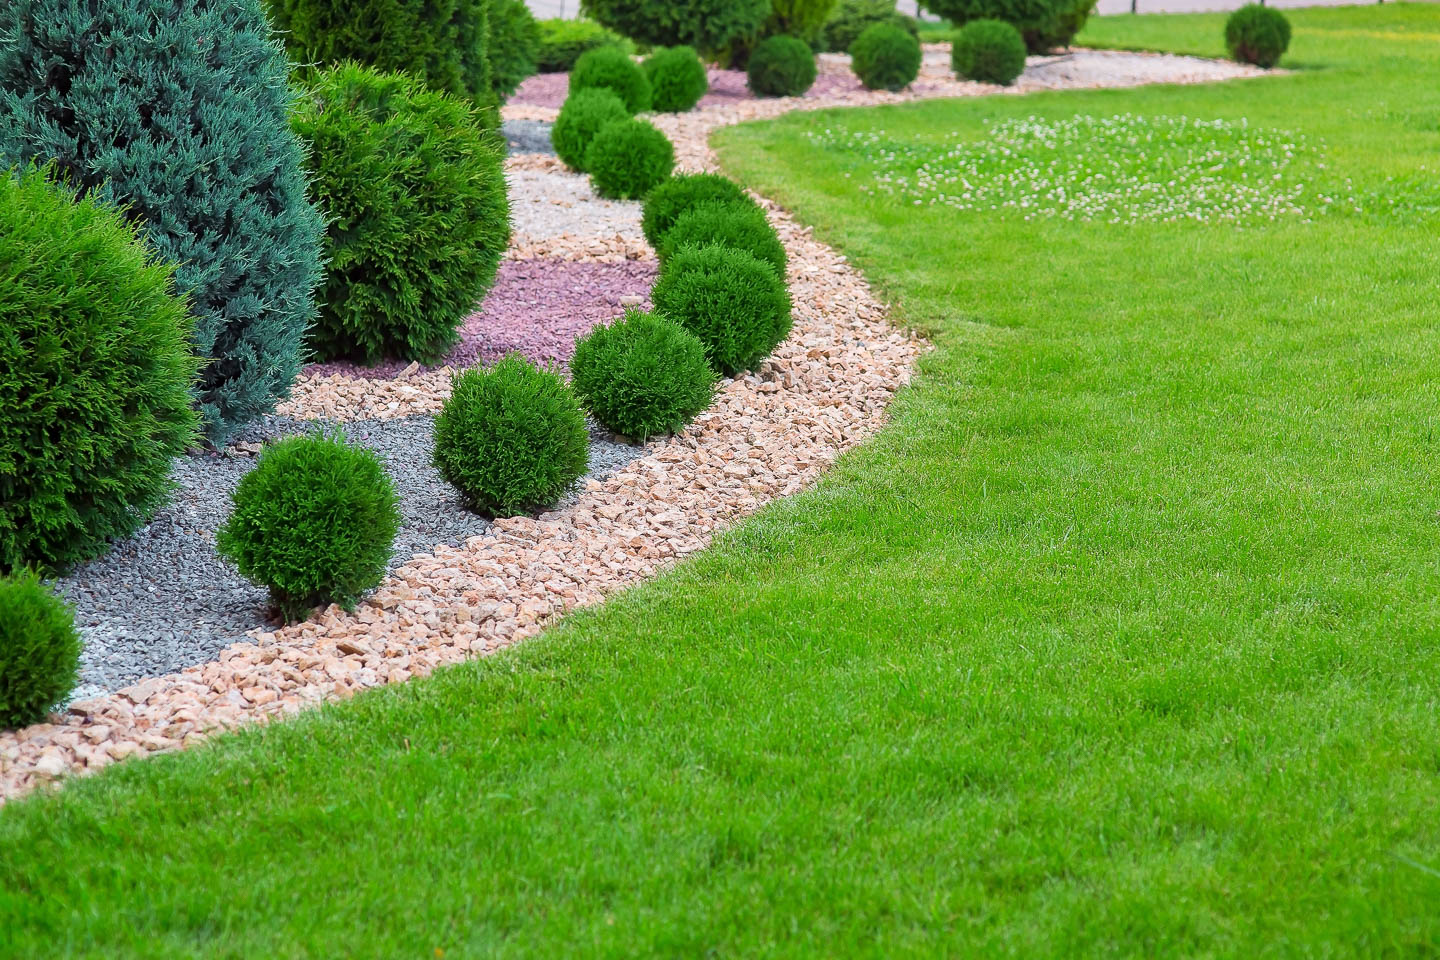
You could even take it one step further and use different colors of gravel as mulch.
Planted with evergreen shrubs, this is one low-maintenance garden bed!
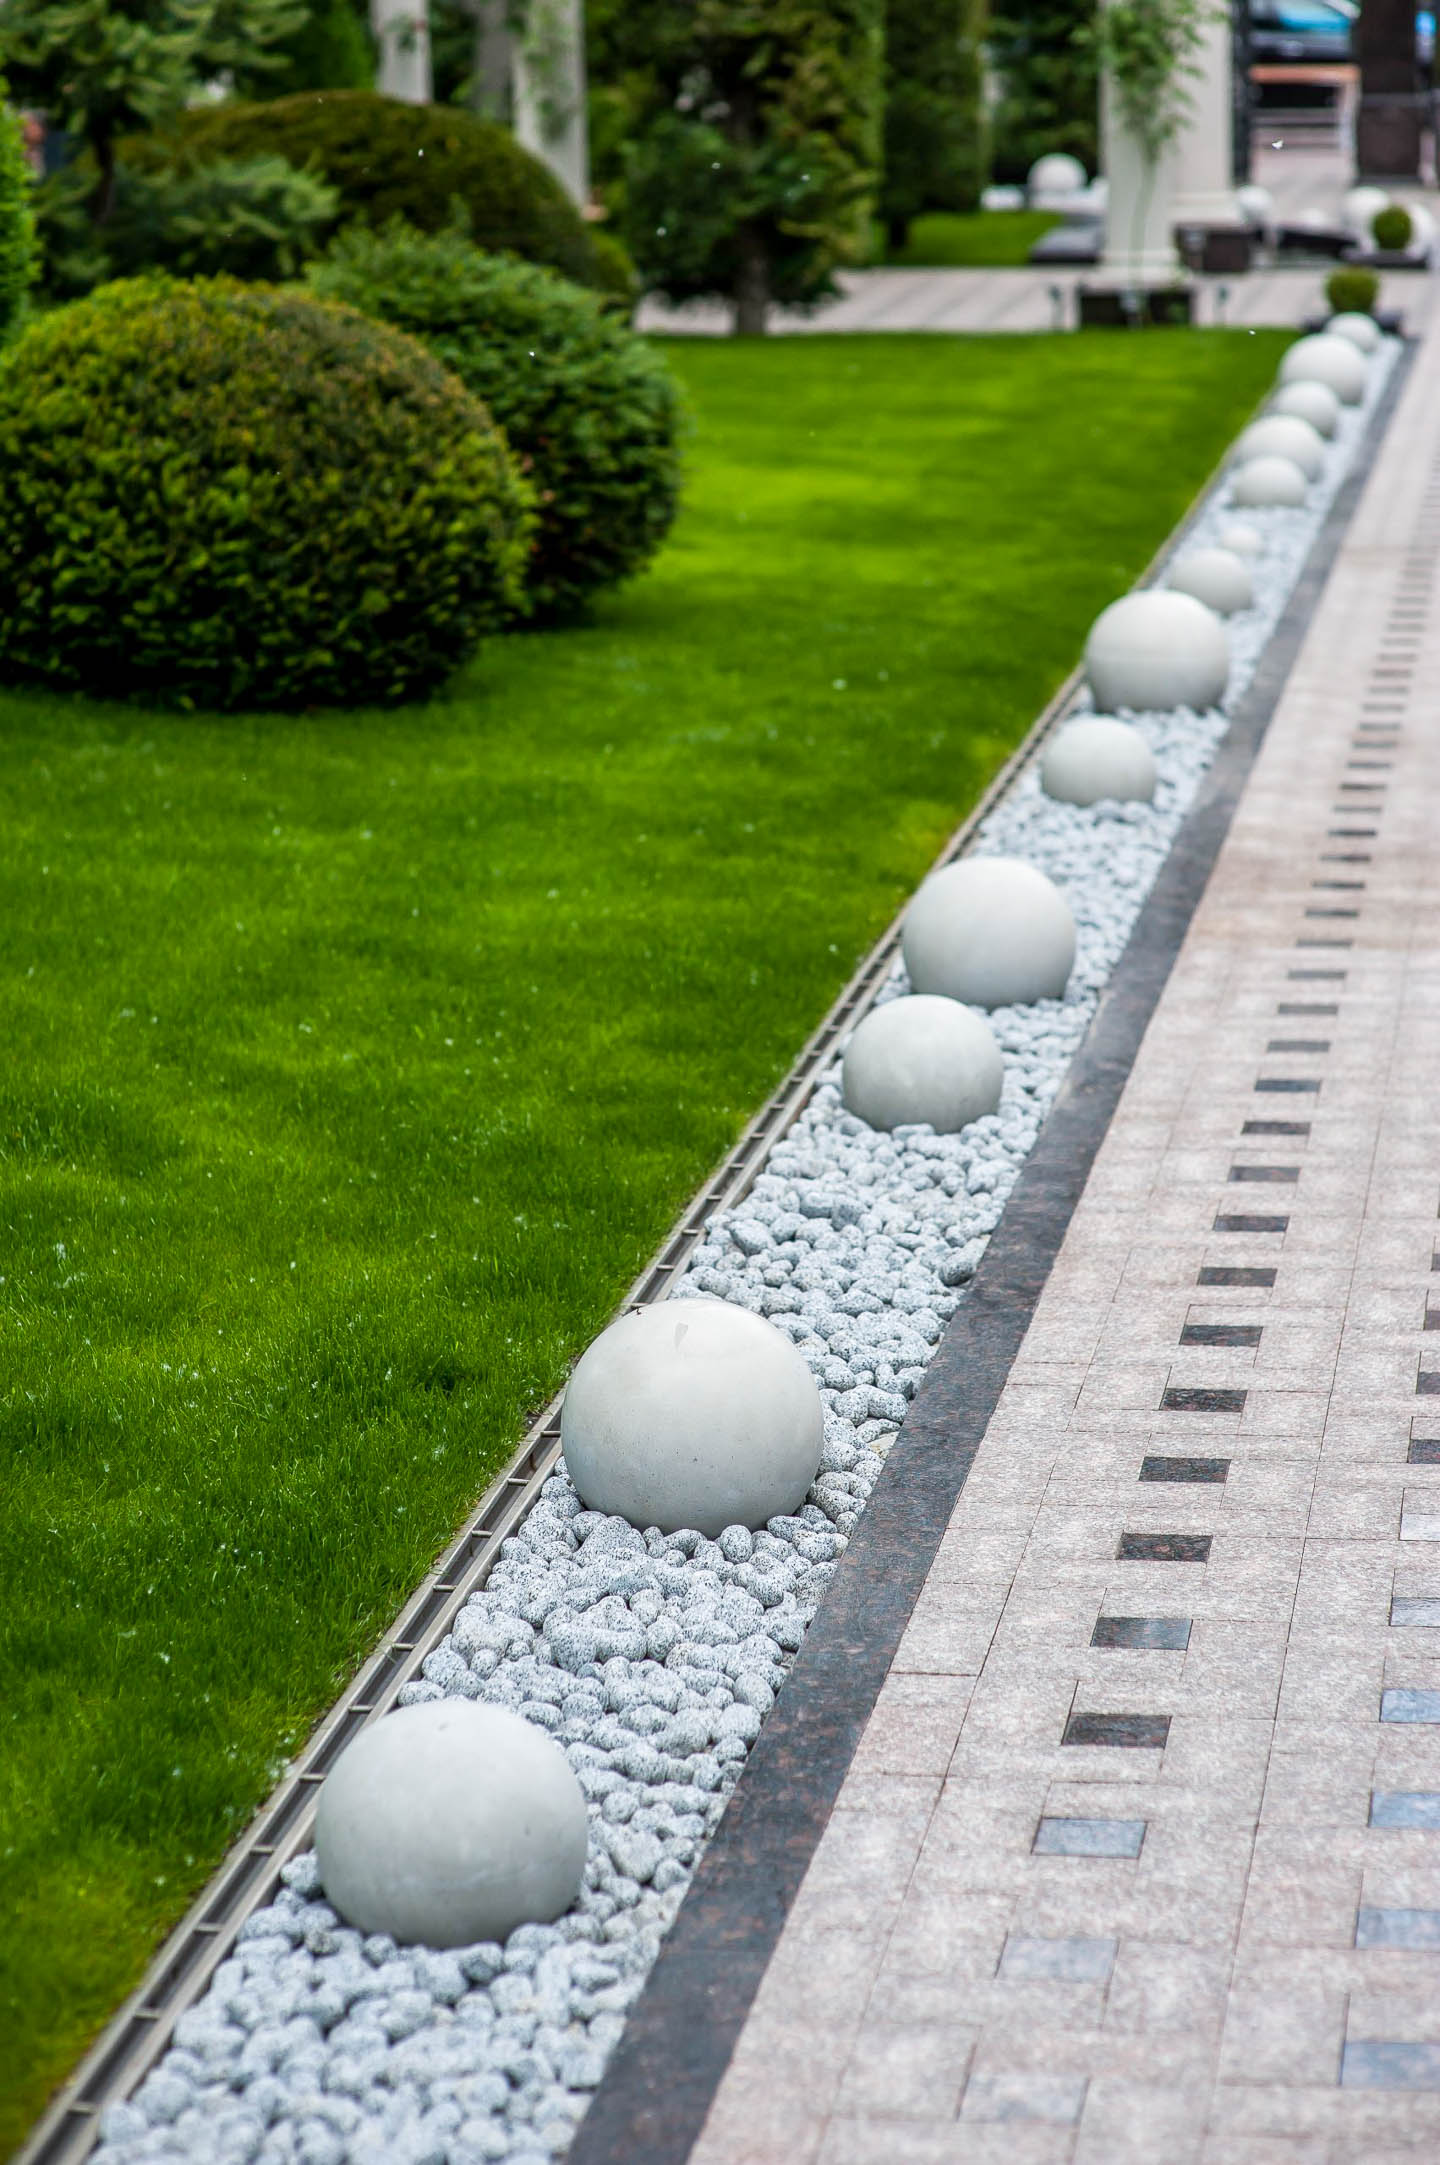
Or if you want to make your gravel edging look really modern, try placing round concrete balls of different sizes all along the center of it.
10 | Sand and river rock
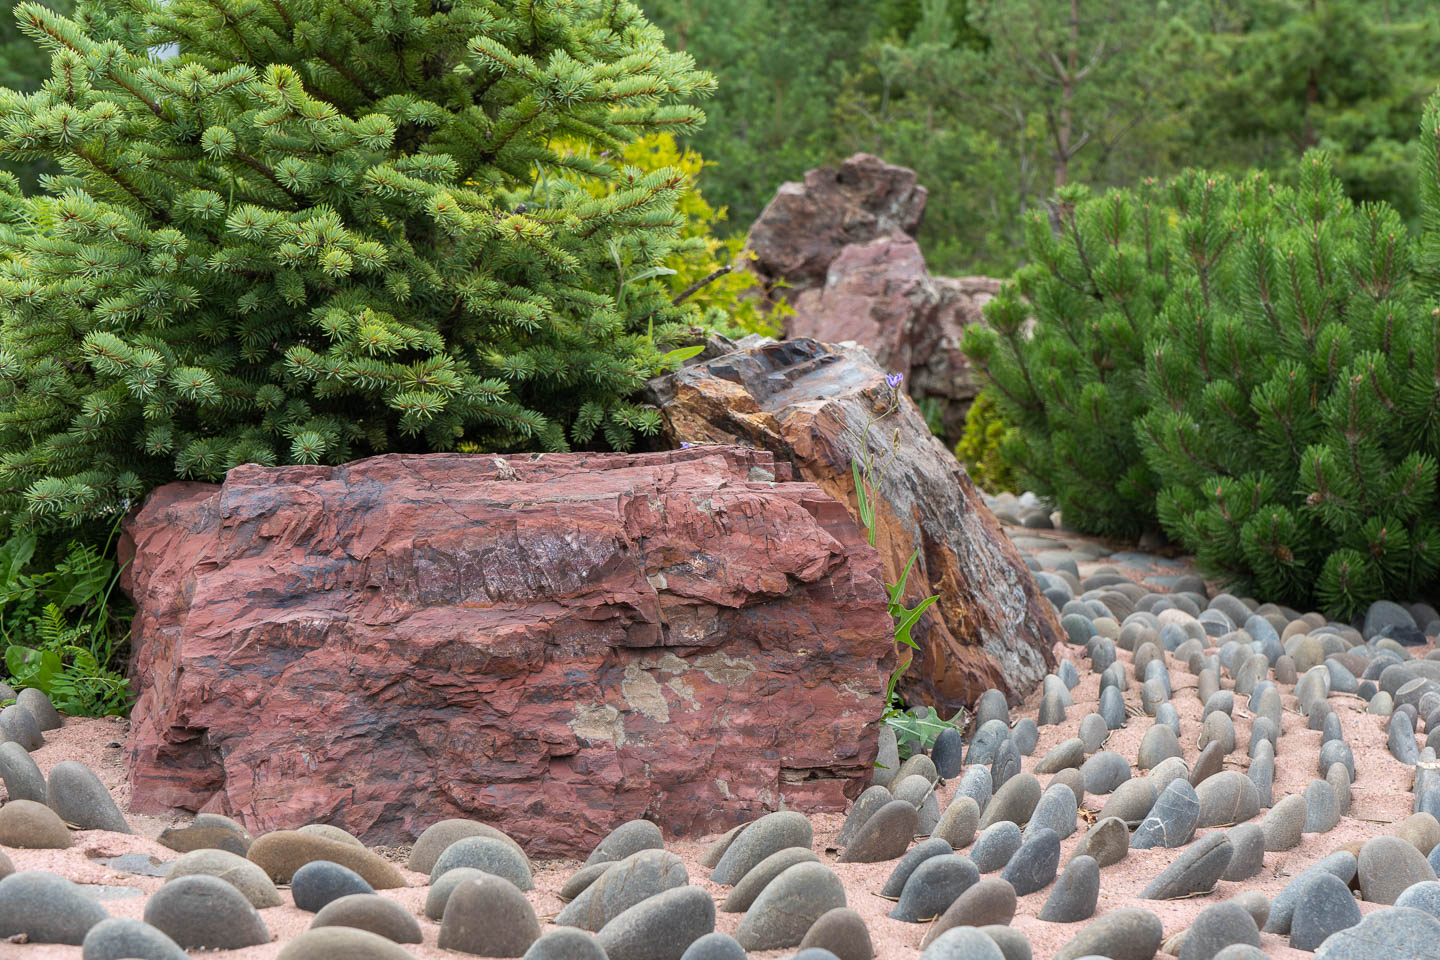
This sand and river rock edging has a very zen feeling like you would find in a Japanese garden.
And while you probably wouldn't make it as wide as this at home, the idea would still work on a smaller scale.
Simply dig a trench, fill it with sand and stand up your river rocks. Or if you wanted a more permanent solution, you could probably use concrete instead of the sand.
However, this wouldn't be a great solution for lawn edging if you want to make mowing easier.
11 | Stacked logs
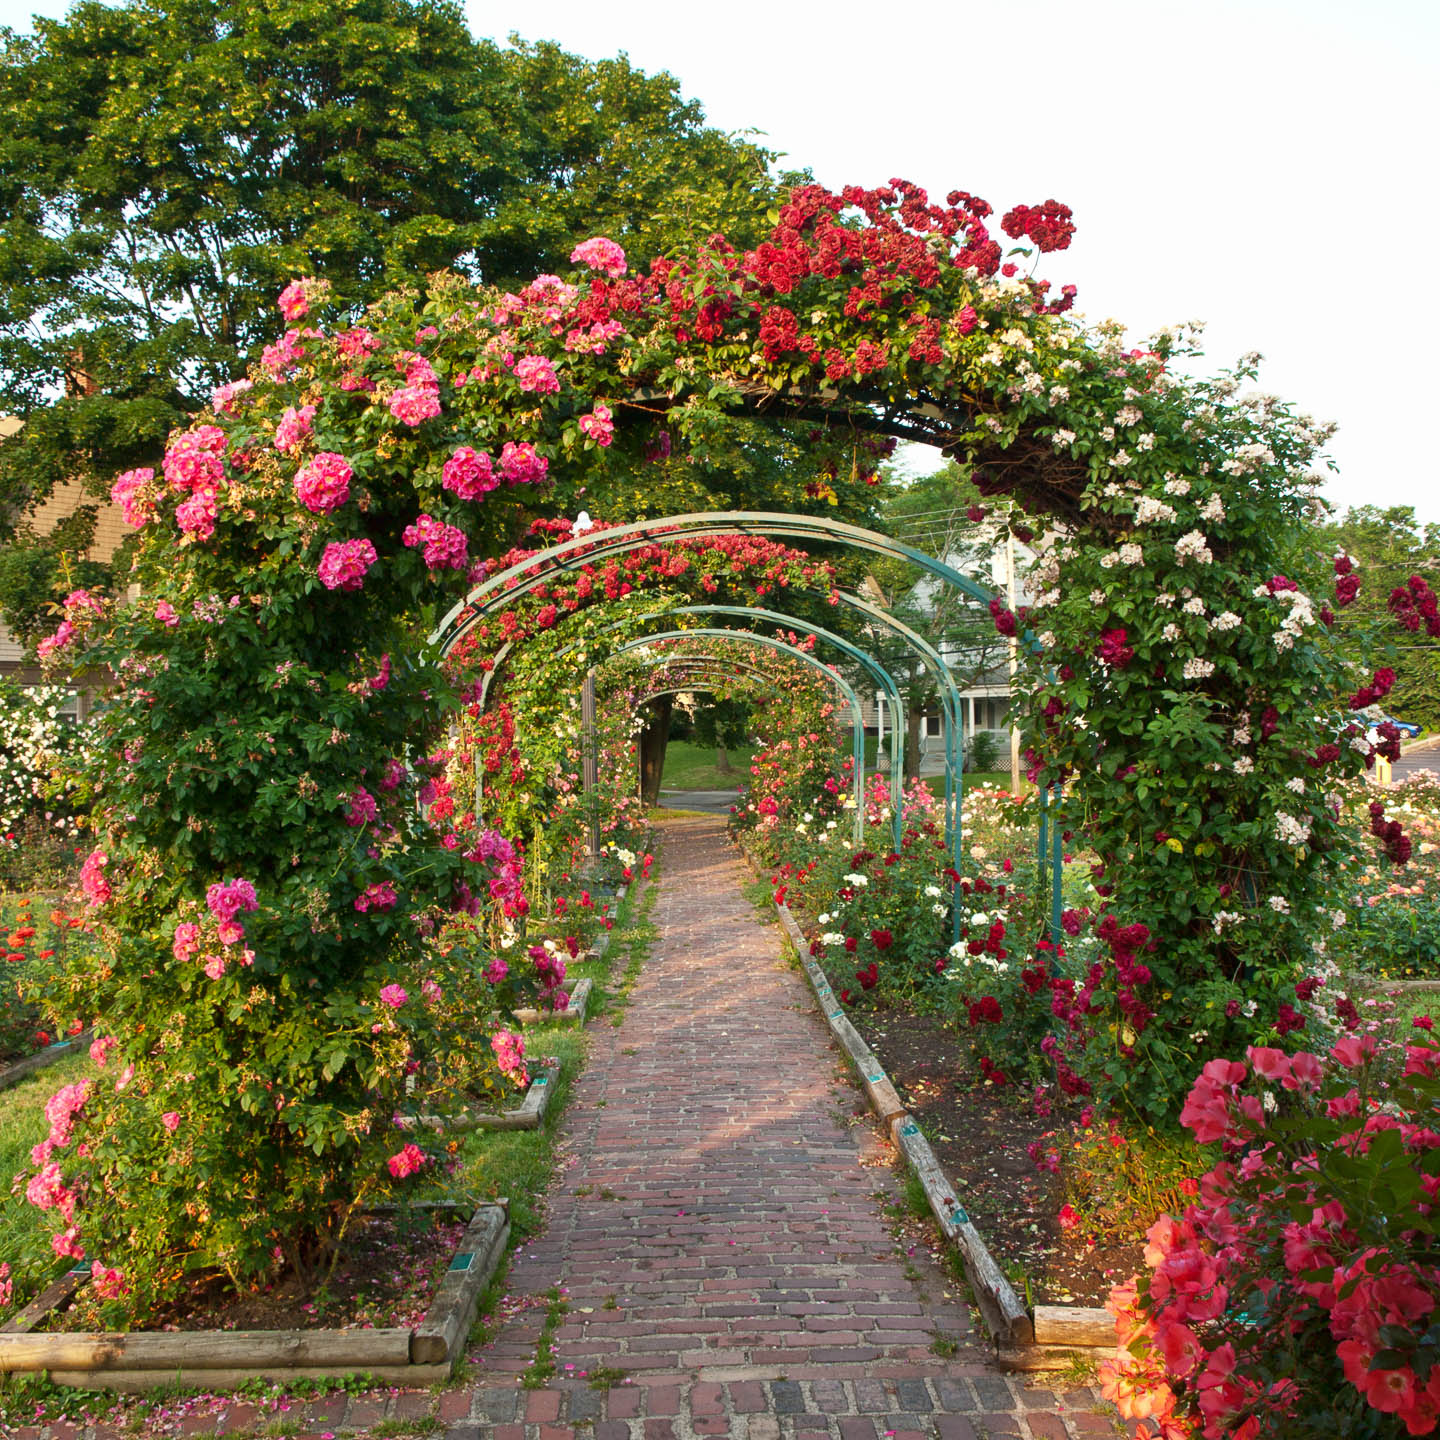
If you are making rectangular (or square) flower beds, stacked logs or railway ties are a fast and easy way to add edging.
When you're laying them down, try not to stack them straight on top of the one underneath. They will stay in place better if you can stagger the ends.
To make the logs stay in place:
- Lay all of them down the way you want them.
- Use a long drill bit to drill a half inch vertical hole through all of the logs at the corners and anywhere else the ends overlap.
- Hammer 3/8″ pieces of rebar down through the holes and into the ground.
This also makes the logs easy to take apart and replace if any of them start to rot.
Or if you want to prevent them from rotting altogether, try these faux wood landscape timbers* from Home Depot.
12 | Woven wood garden edging
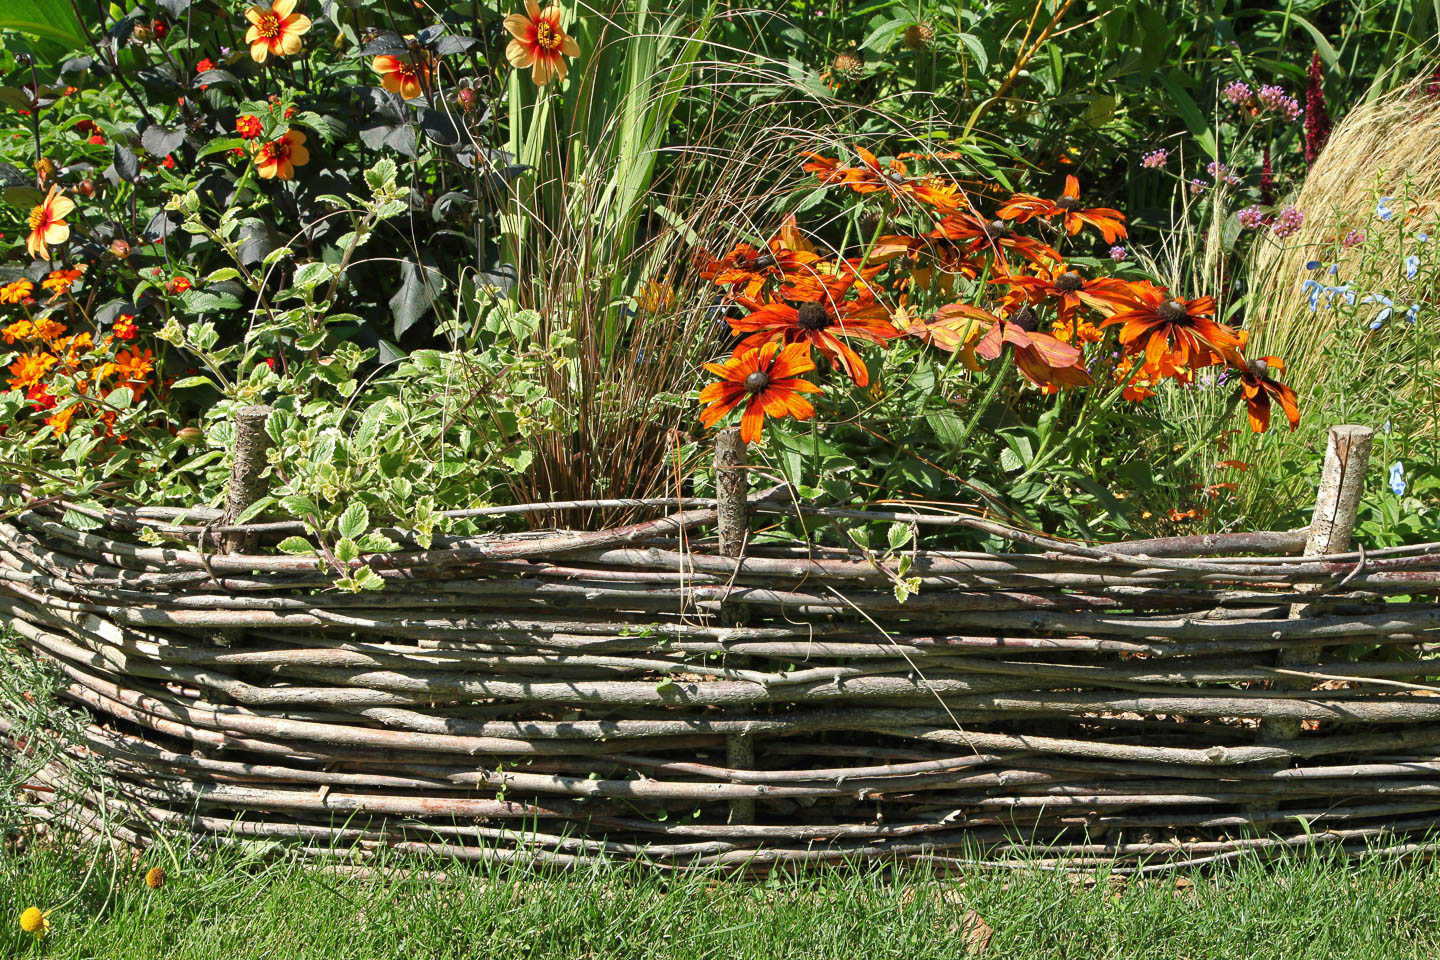
For those who have time and handiwork on their side and love a rustic look, a woven wood garden edge may be just the thing.
The trick to making one is to use green, new wood that is more willing to bend and curve around the wooden stakes.
Willow is the traditional wood for this. But apparently you can even use raspberry canes! (You can find the tutorial for that on lovelygreens.com).
Or if you don't want a DIY project, you can buy 4-foot sections* that are already made.
13 | Wood log roll edging
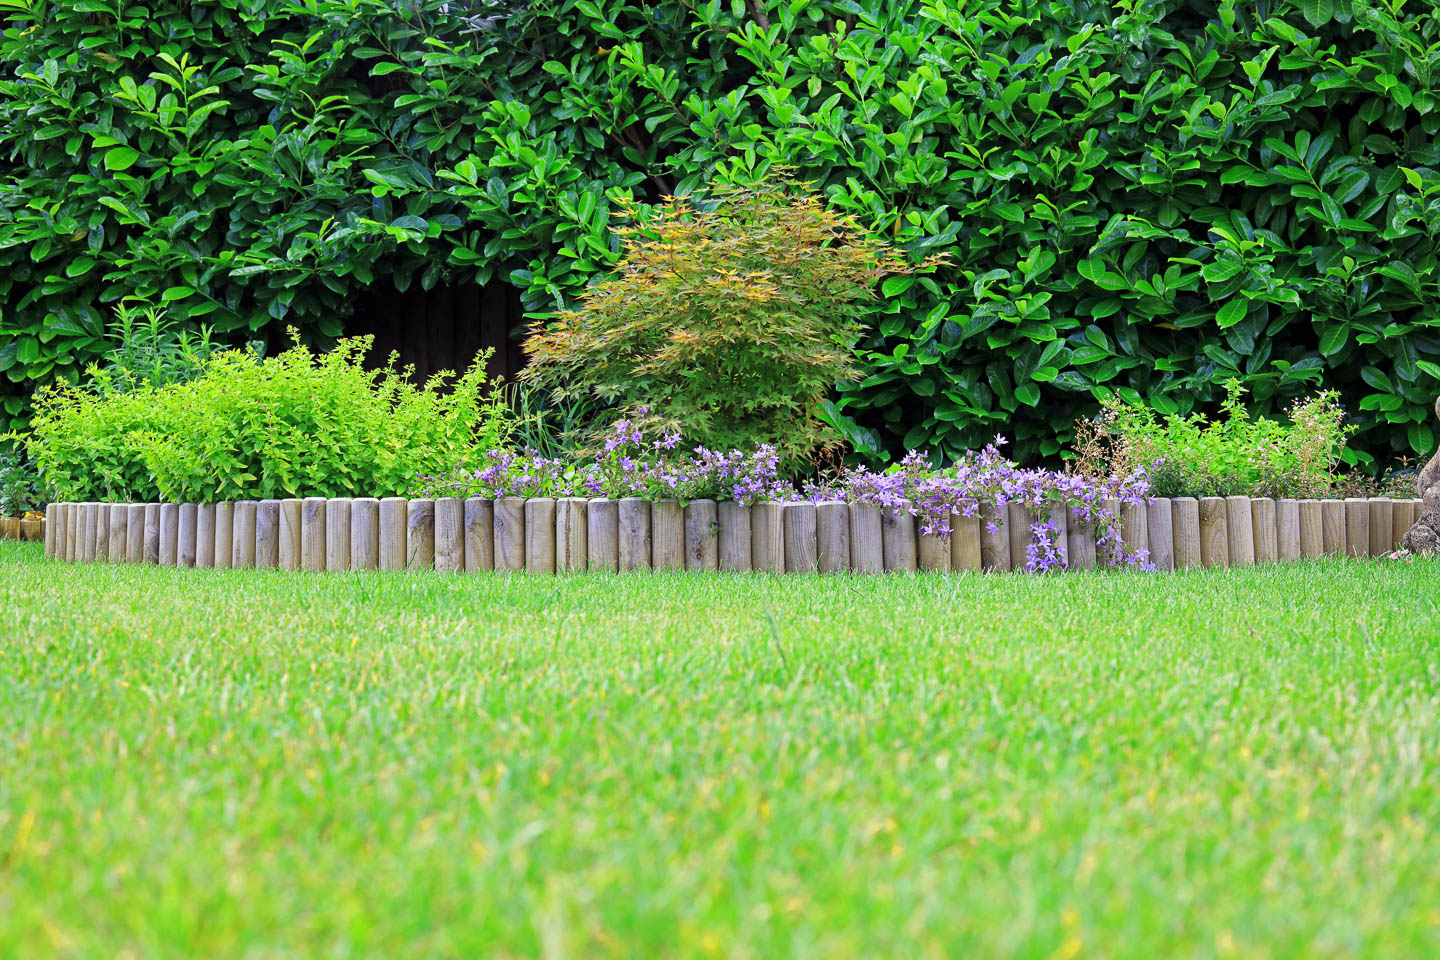
Wooden log roll edging is another option if you need to keep mulch and dirt in a garden bed.
Although you could make your own, the easiest way to get this look is to buy a roll of it already strung together.
They usually come with stakes every few logs that you stick in the ground so it's very easy to install.
And it comes in a variety of different woods and shapes so you can find something that suits your style.
Home Depot has a fairly good selection of them (you can find them HERE*).
14 | Illuminated edging
Garden lighting can really elevate your garden and makes evenings out on the patio that much more enjoyable.
A fun way to add lighting to the garden is by illuminating your garden edging.
The best way to do this is by adding rope lighting strip to the edge of your existing edging. Place it on the side that faces the garden, and it will appear as though your garden glows!
15 | Concrete edging
Concrete edging takes quite a bit of work.
It involves digging a trench, building a frame, pouring the concrete into the frame and leveling it, and then taking the frame off when it has dried. (The video above shows you all the steps).
However it definitely gives you clean lines and a modern look.
It's also very low maintenance. Simply pull out the pressure washer and give it a quick clean every year or so to keep it looking pristine.
16 | Metal garden edging
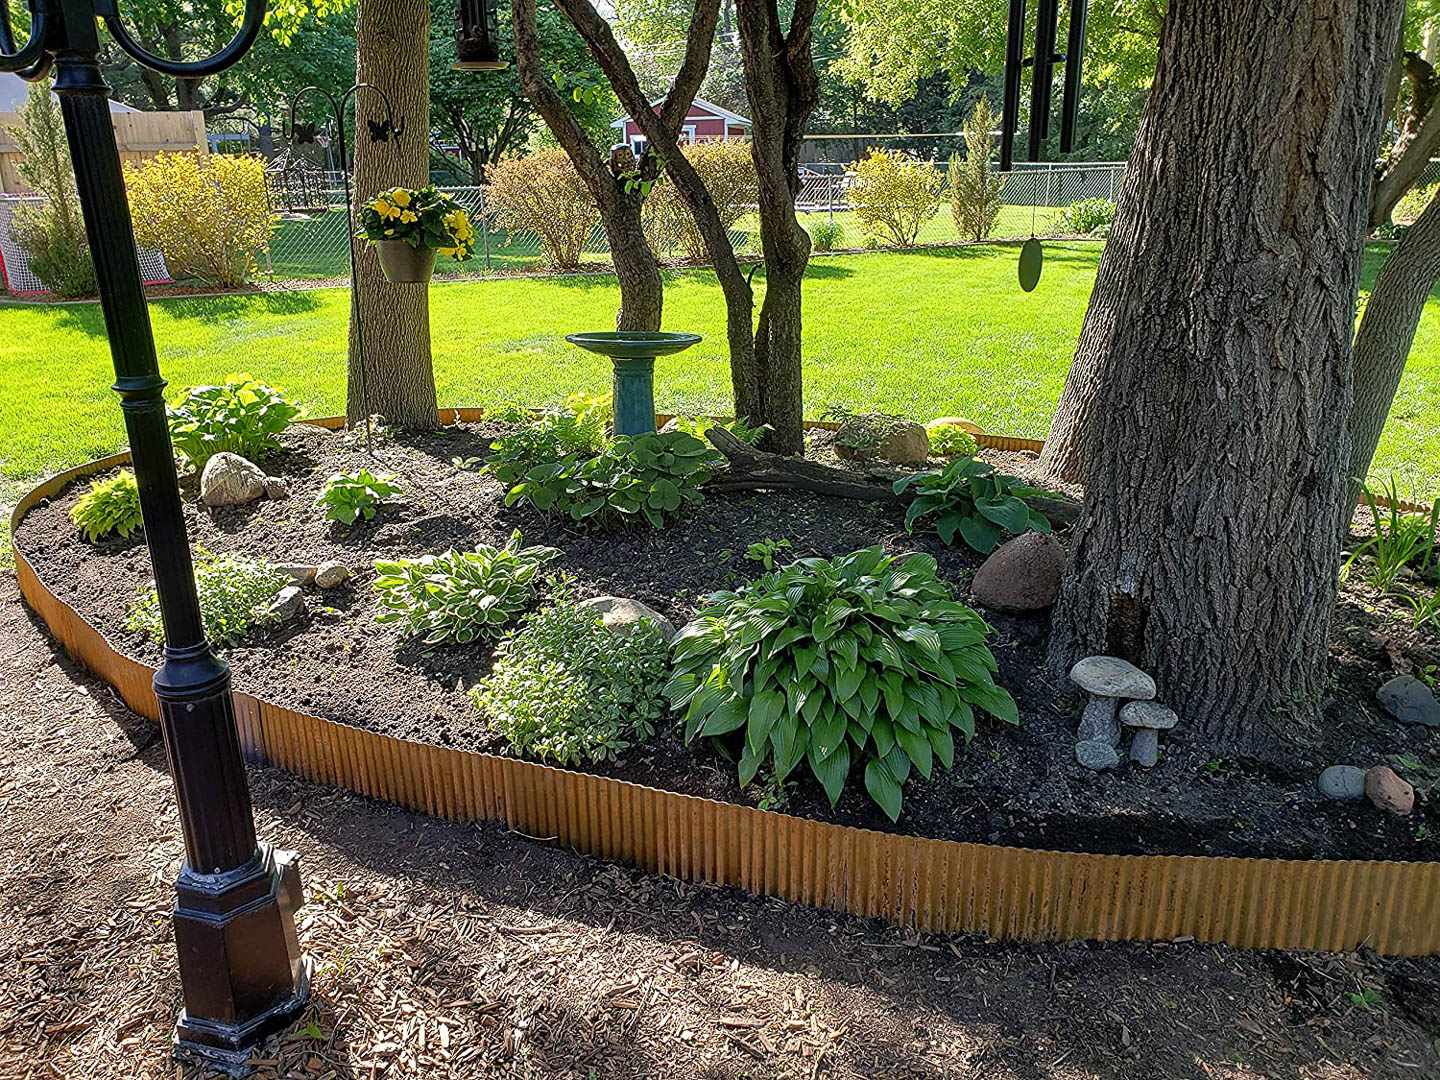
Metal landscape edging is a great way to add a modern look to your garden.
It can be found in black or brown (so it blends in with the soil), or more noticeable styles that are shiny or even rusted (intentionally!). Like the corrugated metal edging in the picture above (found HERE* on Amazon). It comes in two different silver versions as well as the rusted one that is shown.
However, the resulting look is always contemporary and distinctive.
Many metal edges are no-dig options, meaning you can just hammer them in. A lot less work than digging!
17 | Hobby edging
What is hobby edging, you might ask?
I’ve seen plenty of people using quirky and unique items to line their garden beds, especially on Pinterest!
While some of the designs might not be everyone’s cup of tea, they must mean something special to the gardener.
If it can withstand the elements, why not let it line your flower bed? This is a time to get creative and let the garden reflect your personality. Here are some examples:
Bowling balls.
Hub caps.
Upside-down wine bottles.
China plates.
Sea shells.
18 | Plants
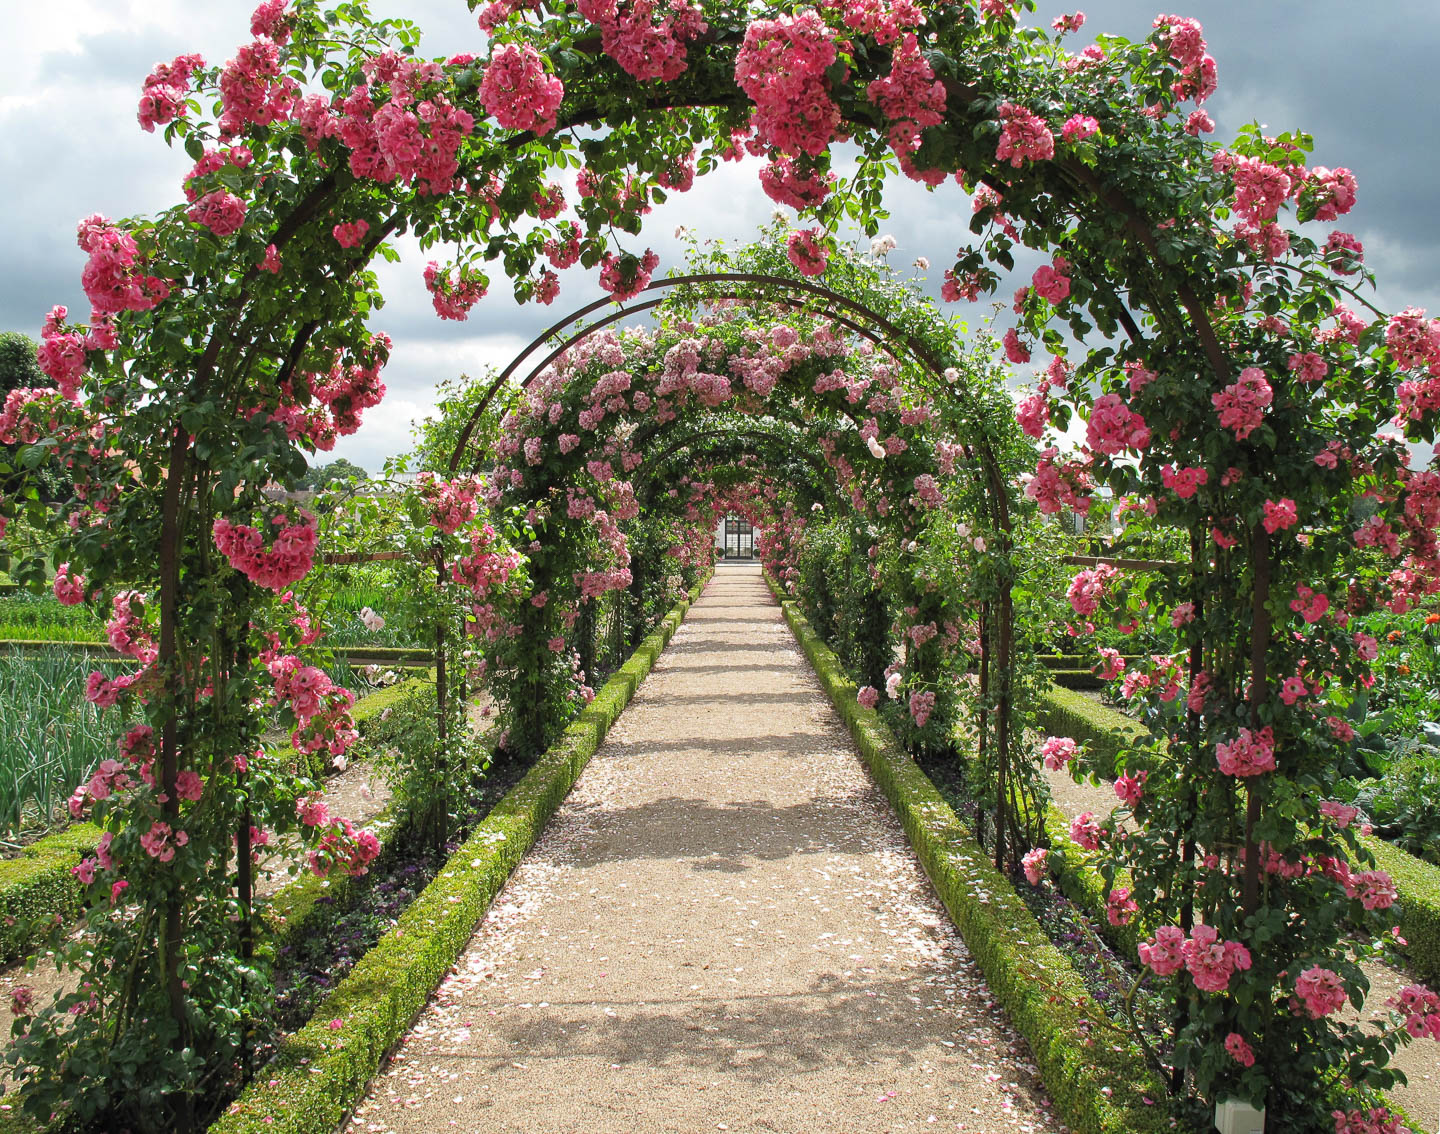
Plants may seem like a strange thing to line a garden bed with. But they can be very effective.
Find small plants that will fill in all of the gaps and grow (or can be pruned) to a uniform size.
Try boxwood to create a hedge, use low-growing herbs for an edible edge, or grow low grasses to create a border.
Using plants as an edge works best alongside a pathway or other hardscaping. (They usually don't do a great job of keeping grass from growing into your flower beds.)
Keep in mind, it may take a couple of years for the plants to create a fill in, but it’s worth the wait!
19 | Shovel (or trench) edging
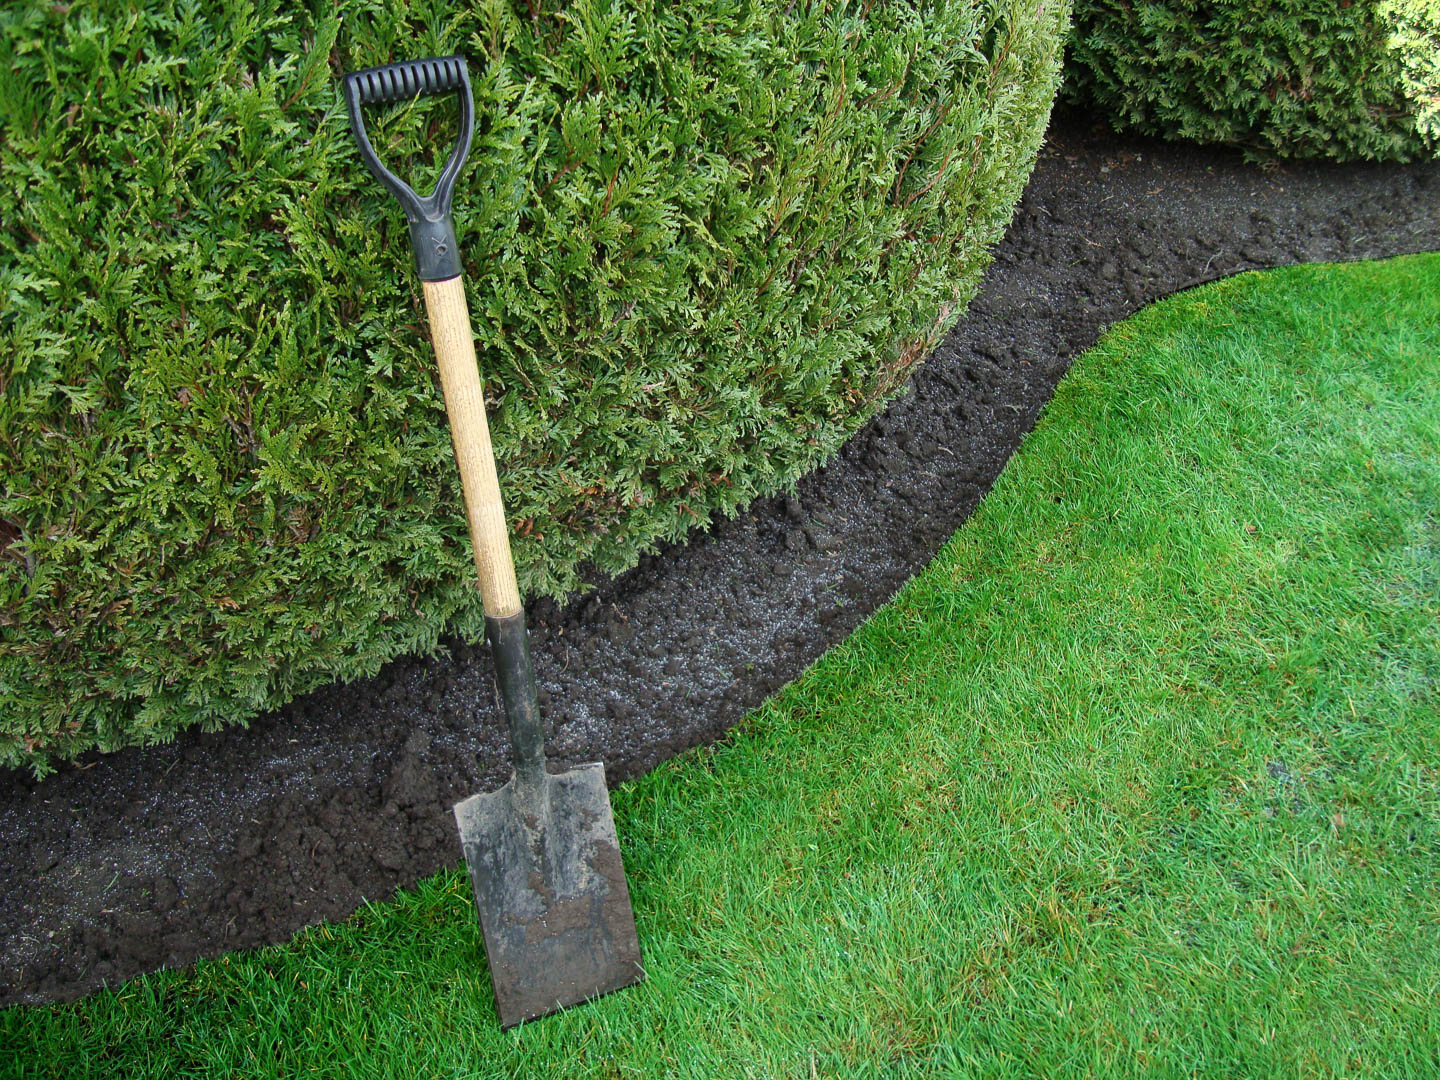
Shovel edging is the least expensive option on the list. All it takes is some digging and the right shovel.
Use a spade (or even better an edging shovel) to create crisp lines between your garden beds and grasses.
The sharp straight edge allows you to cut the grassroots and wedge it up, creating a clear separation between grass and bed.
This process will need to be repeated occasionally to clean up the edges where the grass has overgrown.
20 | Plastic edging

Speaking of budget options, any landscape supply store should have a few plastic edging options that aren't too expensive.
They usually come in either short individual sections or rolls of plastic edging that you sink into the ground.
Plastic edging is easy to install and effectively creates a barrier that will last for quite a while.
I like to install these between my flower beds and the fence. It prevents the soil and mulch from resting directly against the wood so it doesn't rot as quickly. And since it's at the back of my garden bed, you can't really see the plastic.
21 | Cinder blocks
Looking for something economical to line your vegetable garden with?
A few cinder blocks take minimal work and a small budget to create an edge.
Lay the blocks down to outline your garden and get planting. The weight of the blocks means you really don’t have to do much besides set them down.
While not as visually pleasing as the other options on the list, you can dress them up with fun paint or even fill the holes with soil and grow more flowers and plants in the gaps!
22 | Small fence edging
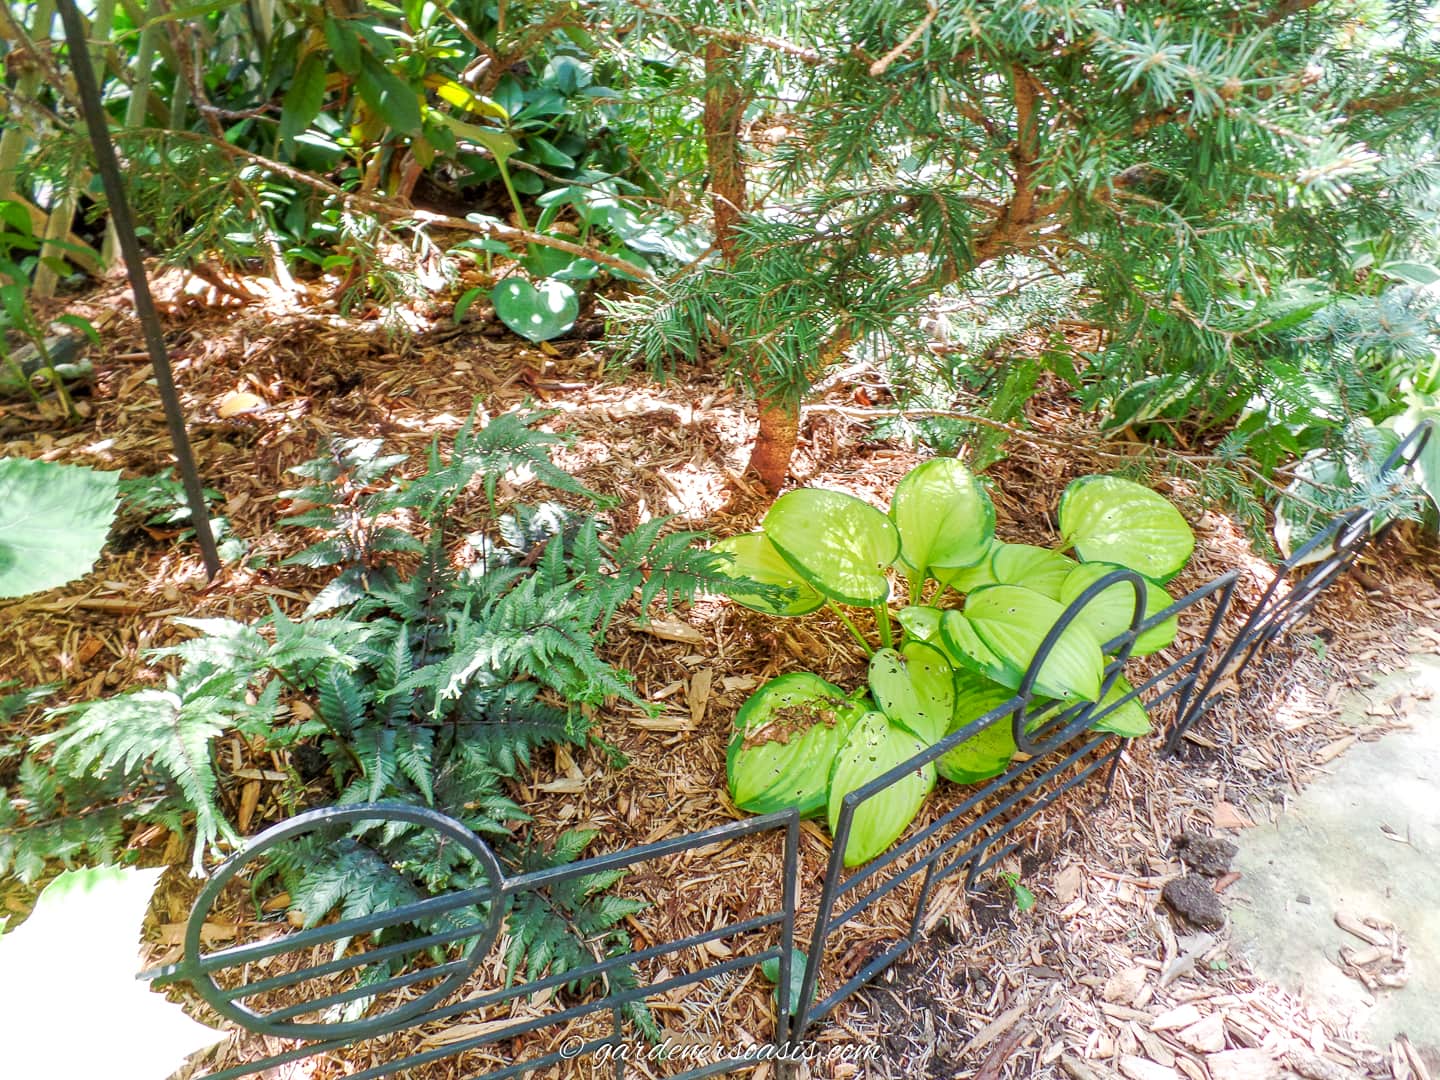
If you are looking for more of a visual separation to keep people (or lawn mowers) from messing up your garden beds, a small garden fence (like this one*) will work.
They come in different sizes, colors and designs so you're sure to find something that matches your garden design.
However, it won't prevent mulch or dirt from washing off the garden beds.
That's it for our list of garden edging ideas. Hopefully you've found an option or two that will work for your yard.
Other landscaping ideas you might like
Or browse all of our landscaping ideas.
Have comments or questions on our garden edging ideas? Tell us in the section below.
This post was originally published on July 15, 2021 but was updated with new content on December 3, 2024.



Edgings like red tipple or stone allow weeds to grow; not a tidy looks and requires constant weeding to keep it neat.